
Alexander Grabovetskiy, woodcarver, School of Woodcarving · Published 2017
Part of Carving Antique Style Rosette

The full video lesson is inside the school.
Alexander Grabovetskiy, woodcarver, School of Woodcarving · Published 2017
Quick answer: Groove chipping is the wood between two knife lines splitting away, because the second line has much less wood beside it on one side than on the other. In this rosette workshop I knife the first line straight down, take the waste out with a small gouge (a number nine), and only after that knife the second line.
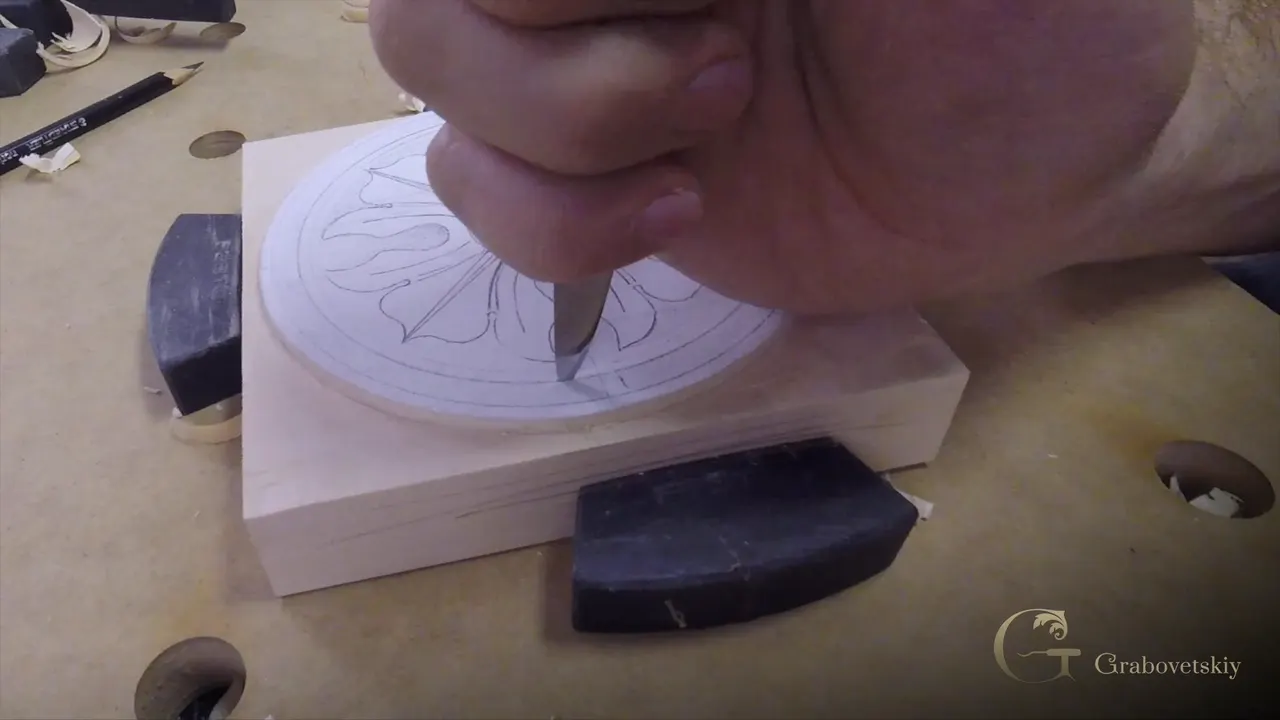
A carved groove chips out when the knife meets a strip of wood that is thin on one side and thick on the other. Put the blade in there and the wood wants to break two ways, and the thin part goes. Workshop 2 of Carving Antique Style Rosette is where I stop that with one relief cut, made by a small number nine gouge before the second line of the ring.

Want both walls of a ring to stand up clean? Want to see where the wood will break before it breaks? Then watch the order. The first line, the relief cut, and only then the second line, and on this rosette that order is what keeps the ring whole.
Uneven wood. When the first line was done and I got ready for the second, I stopped and showed it on the rosette. On one side of that second line I have a lot less wood, and on the other side a lot more.

Once I place my knife there, it will try to split the wood both directions, and guess what? That small section will just chip out, and on this piece I can't allow it.
The tendency is easy to understand. The knife is already in your hand, the second line is right there, and you just go ahead and do it. In the lesson I call that a big mistake, and I say it before I touch the second line at all.

The first line comes before any of that. I take my knife and place it straight down without angling it, and I go little by little, because I don't want to force it. Really important that you follow this line. By the end of that pass I'm almost an eighth of an inch (3 mm) deep.
Keep the knife from moving right or left, because if it moves, it leaves a bevel.

Something else happens on purpose here. The section between the lines will be removed as a background later, but on the inside I leave some of it standing for now. I need some meat there, some wood. Otherwise it chips.
It takes the meat out of the way before the second line goes in. To get rid of the chipping problem I take a small gouge, a number nine, and make a relief cut really, really close to the inner line, and I just go around carefully. A depth limit comes with it too. I can't go too deep, because I have to be consistent with my background, and that background is 1/8 inch (3 mm).

Close, but not on it. I am almost on the line, but I still leave about one millimeter (1/32 in), I'd say, and then I remove the waste. It comes off as a nice curl. Beautiful.

You don't need my exact gouge. In the lesson I say this part is really important to understand: you can do it with the V tool, or you can do it with the small gouge, number nine, number eight, number 10 or number 11. With any of them you're just removing the meat of it.

Workshop 3 of this course explains what the relief cut does for the wall. When you place your tool and the wood is solid, it pushes the wood to both sides and the fibers are just smooshing. With a relief cut beside it, the fibers go one way and those fibers stay almost untouched. The name itself, and why I call it a relief cut, I talk about on Carving Grape Onlay 14.
About a sixteenth of an inch on the first pass. For the inner line I take the knife again and place it on my line, and you can see how I placed my fingers. My hand sat one way on the first line. This time I'm more careful, guiding with my finger and holding the knife almost like a pencil, and I don't go as deep.

I'd rather make two cuts, three cuts, than make a mistake and snap it, because this section is only an eighth of an inch. And believe me, it's really easy to snap. Especially at the end grain, and right then I was doing the end grain.

I finish that circle and then start a second pass. Now I'm going deeper, and I change the way I'm holding the knife. Then I check. Yep, fits perfectly. Back at the start of all this, by the way, I said I would show what I was going to do before doing it.
Speed does it. Your eye can easily catch it if your line is wavy. It doesn't matter how stable your hand is. If you're trying to rush it, no matter how good you are, the line is going to be wavy, and it's not going to look clean.

This ring can't have any waviness, so I'm really careful just to follow the line, and I rotate the piece again and again. I say let me rotate about ten times in this one lesson.
Well clear of the blade. This is a really important rule. When you carve with a knife, especially with a knife, your second hand is always away from the cutting blade. If I put my hand in front and my knife slips, I can cut it.

Beginners hear the same rule from me. In Beginner in Woodcarving Workshop 2 I say you never place your hand at the front of your knife, because you can cut yourself, and even if you have to hold the piece, the hand still has to be away from the blade.
| Tool | What it did | Depth, or the words I used on camera |
|---|---|---|
| Knife, first line | Straight up and down, a little each pass | Almost an eighth inch deep |
| Gouge number nine | Relief cut near the inner line, going around | Leaves maybe one millimeter standing |
| Knife, second line | Finger as guide, held with a pencil grip | First pass, a sixteenth only |
| Grounding tool 47 | Ashley Iles, worked in without touching my wall | Important not to rush it |
| The background tool | Lowers that down, then I just work around | Same level as my background |
| Number three gouge | Quarter inch wide, and the wall stays strong | Exactly an eighth inch deep |
With a small grounding tool, and slowly. After the check I was going to take an even smaller gouge, and then I said I don't need a gouge, I can use my grounding tool. My first one was too big for the ring. I took a grounding tool number 47 from Ashley Iles and just worked my way in.

It's also important not to rush it. I'm trying not to touch my wall, and when I rotate the piece I work the other direction, where the grain runs diagonal.


Then it looks like I have to use my background tool to lower one part down, so I make sure it's on the same level as my background on that side and just work my way around. After that a number three, a quarter inch (6 mm) wide.

Here the relief cut pays off. You can see it, because I made my relief cut, that side is really strong, and it won't snap anywhere. I think it's enough. It's exactly an eighth deep right now, and later on I have to clean it.

Three other rosette courses show the same idea, each on its own design.
The lesson Flower Rosette 2 has me working by a weak point. Punch that too hard and it's going to snap out, and I don't want to see that. So I take a V tool first and just outline it, because those spots are kind of weak spots and it's a good idea to outline slightly. Just a relief cut. Then the easiest way is probably a knife and a straight down cut, and I clean the background.
I give a safer way out loud in lesson 3 of that course. If you feel safer, take a V-tool first, go a little off the main line, and then make a clean cut.
I call lesson 4 a really good practice piece to practice how careful you are in carving. My number 12 knife goes straight down. I hold it almost the way I hold a pencil. When I take the wood away the angle is really low and I'm cutting away from myself, so I can control it much better. If I push too much, I can snap that side. It's better to make a couple passes than snap it and make that big mistake.

The Venetian Flowers Rosette 4 lesson has a separation between two parts, and a straight down cut relieves it first. I tell the students they know why already from the earlier videos. It's really important. Next I excavate the area beside it and attack that from the side, so the curl comes out a true curl. I take a number nine. I can always walk around and attack from the opposite side. By the way, I also relieve a small triangle with a number 11, knife straight down, so that way I don't lose its position. Then it's a number nine again, about half an inch (13 mm), almost all the way to the ground, leaving no more than five millimeters (3/16 in) or so.
Later in that same lesson I make a relief cut with my number 17, which is almost like a V tool, but it's not. I have to be careful not to hit the background. Hitting it makes it much harder for me to clean. That section then has to go down, and I use a bigger tool, maybe a number seven or a number five. It doesn't really matter as long as it works.
Chamomile and Bow Rosette starts its petals the same way, one small number 11 and relief cuts, just relieving those spots. Then a tiny number 11, like half a millimeter (about 1/50 in), makes the first separation between the petals, and I call those cuts preliminary.
In this lesson I put it as soft enough, but still stable. While I work the ring I say there is almost no limit to what you can do with limewood or basswood. Of course there is a limit, but almost no limit.
In old European culture it wasn't considered a softwood. It was considered a hardwood, and a softwood would be like a pine. Lime, linden, basswood if you are in the United States, and it's the same wood.

I also tell the history the way I know it. In England, as I say in the lesson, the cheaper carvings would be done in pine, and the more expensive carvings in oak at the beginning, and after the 17th century in limewood. Grinling Gibbons brought that idea to England from old Europe, from Holland, to be exact.
Wikipedia's page on Grinling Gibbons says he was born in Rotterdam in 1648. If his kind of carving pulls you in, there is a whole course on it, Grinling Gibbons, Class in Maine.
This rosette is relief work, with a background 3 mm (1/8 in) down. It sits between workshop 1 and workshop 3 of the course, and if a number 47 grounding tool or a number nine sweep is new to you, All about tools for Wood Carving is where to look first. Tuition opens the lessons, and the video shows every pass of it.
My rosette had a second line with a lot less wood on one side of it than on the other. When I place the knife there, the small section chips out. So I took the waste out first with a number nine, before the knife went back in for the other wall.
In workshop 2 I reached for a small nine. A V tool works too, I say, or a small gouge, an eight, a 10 or an 11. Any of them is just removing the meat right beside the inner line, and never deeper than my background.
Inside this ring my first pass went roughly 1/16 inch (1.5 mm) deep, and not deeper. The section is only an eighth (about 3 mm), and believe me, it's easy to snap at the end grain. I'd rather make two or three cuts. The second pass goes deeper.
Always opposite the edge, never in front of the knife. My second hand stays clear, because if I slip, I can cut it. Beginners hear the same from me, and even when you hold the piece, your hand stays away.
In old European culture, as I say in this lesson, limewood was considered a hardwood, even though it's soft. A softwood would be like a pine. Lime, linden and basswood are one wood, and to me it is soft enough, but still stable.