

Alexander Grabovetskiy, woodcarver, School of Woodcarving · Published 2022
How do you carve to an exact depth in relief carving?
Quick answer: Carving to an exact depth is taking the height off a piece you already carved and drilling to it in the new one. On my floral panel the high spot had about a quarter inch to go, so I drilled about 6 mm, checked the limiter gap with paper, and carved toward the holes.
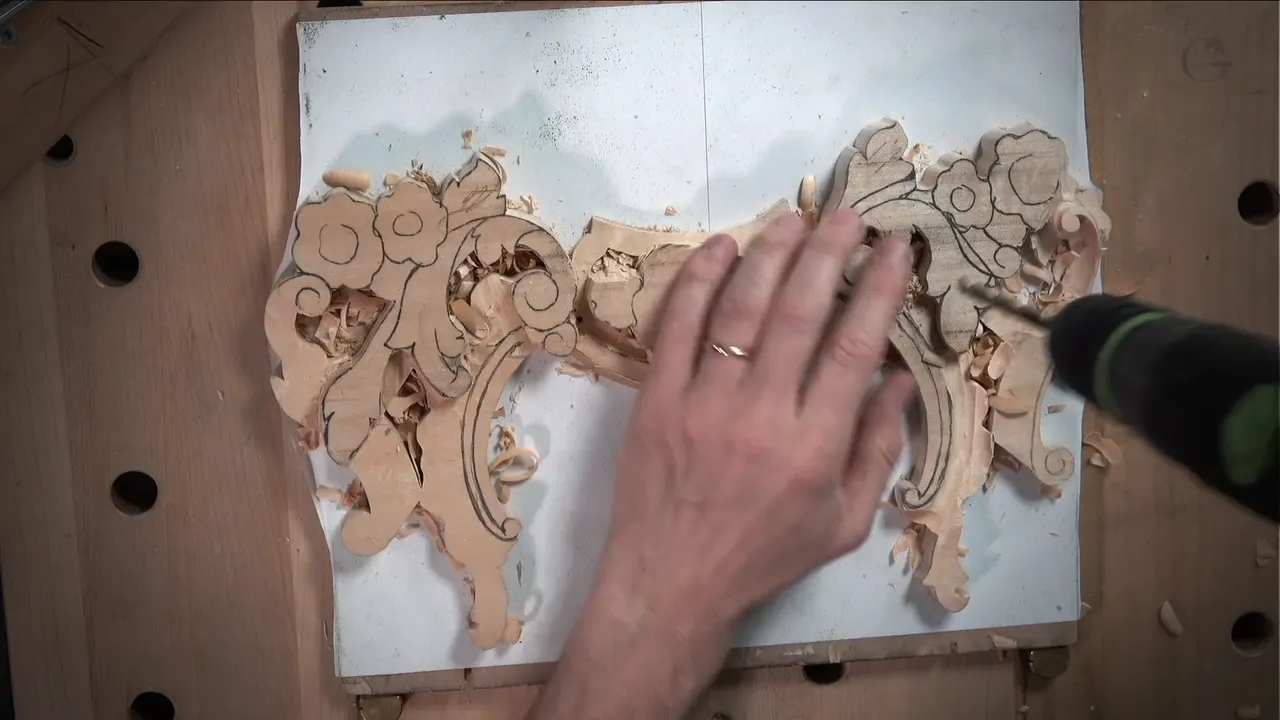
Carving to an exact depth, on this floral panel, is a reading and a hole. I take the height off the first piece I carved, drill that deep into the new one, and then carve down toward the hole.
This is lesson 4 of my course on a floral and molding panel, and the piece on the bench is the second of a mirrored pair. So the relief carving depth is not mine to pick freely, because it has to match a panel I already finished.
You want the second piece to look like the first, right? And you would rather not go too deep in a spot where the wood can't come back? Then measure first and drill to the number. You'll see the readings I took and the gouges I used.

Six things this lesson shows about depth
- The depth is read on the first piece, at the high spots of its convexes.
- A drilled hole gives you a few fixed spots, so you can see how deep you are while you carve.
- My first hole went down roughly 6 mm.
- A slip of paper in the limiter's gap told me I was close enough.
- Keep the wall straight down at 90 degrees, with no undercut there.
- After carving down I measured again, and only then took the big flat gouge uphill.
Where does relief carving depth come from on a mirrored panel?
From the piece I finished first. Before I go too low on the new one, I have to reference with my first piece, and I said it on camera. Really important.
Look at the first piece and you find some high spots on the convexes. Those are what I measure, and that gives me the depth.
The pointing machine does that measuring for me. I love that tool, it's just such a beautiful tool, and before that first reading I made sure it was tight and not moving too much. If you have never seen one, the pointing machine page in the tools course shows its parts, where the name comes from, and why the drill bit has to be wider than the needle.

Widths are a different job, and for those I used calipers. I went back to my previous piece and measured, because that way I know I'm going to be somewhat accurate. I can always eyeball it. But if I can measure it, I don't really need to.
The widest spot came to about half an inch (about 13 mm), and I marked it on both sides right away. The last point on this side was maybe about seven millimeters (just over 1/4 in), and the volute itself about six millimeters, a quarter inch.
Later in the course, in lesson 8, measuring how wide a molding was going to be, I called calipers always, always the best tool, I would say. Once the widths were done there, I didn't need any more calipers. The pointing machine took the height on the sides.

Then the middle ridge. It slopes both directions, like a convex on one side and somewhat like a concave on the other, and that one I just eyeballed, because I know approximately how it's supposed to go. I also wanted it really flowing, with no straight lines. I really don't like the straight lines.

I outlined with the same number nine, 10 mm, like three-eighths of an inch, one side at a time. The blank wasn't sticking to its board anymore on that side. I didn't re-glue it. I just had to be careful.
Why drill a hole instead of just digging down?
You see the depth while you carve. At the highest spot I had approximately a quarter inch to go, and yes, I could take just the gouge and start digging. On camera I showed a different method instead.
You drill a hole, and that way you establish a few spots.

The payoff came in the next part of the lesson. I was working down with a small antique gouge, really close, but not at my destination in that spot, and I could see my depth. See it? You can see how deep you go, and you connect pretty much those two spots, those two points.

How deep did I drill on this shell?
About six millimeters, with a quarter-inch drill bit. I knew I had to drill approximately six millimeters down, and I had a reference, so I could see it and not overdo it.
Then I measured again. I was pretty much right there.

The other side needed about a quarter inch too. I had to take out a clamp to check it, and it's kind of hard to find the position, but I was right on the money again.
After that I said I needed a couple more spots, like the midpoint and closer to my final volutes. Near the volute the reading was about 10 millimeters, about three-eighths of an inch. Maybe not exactly three-eighths, but pretty close.
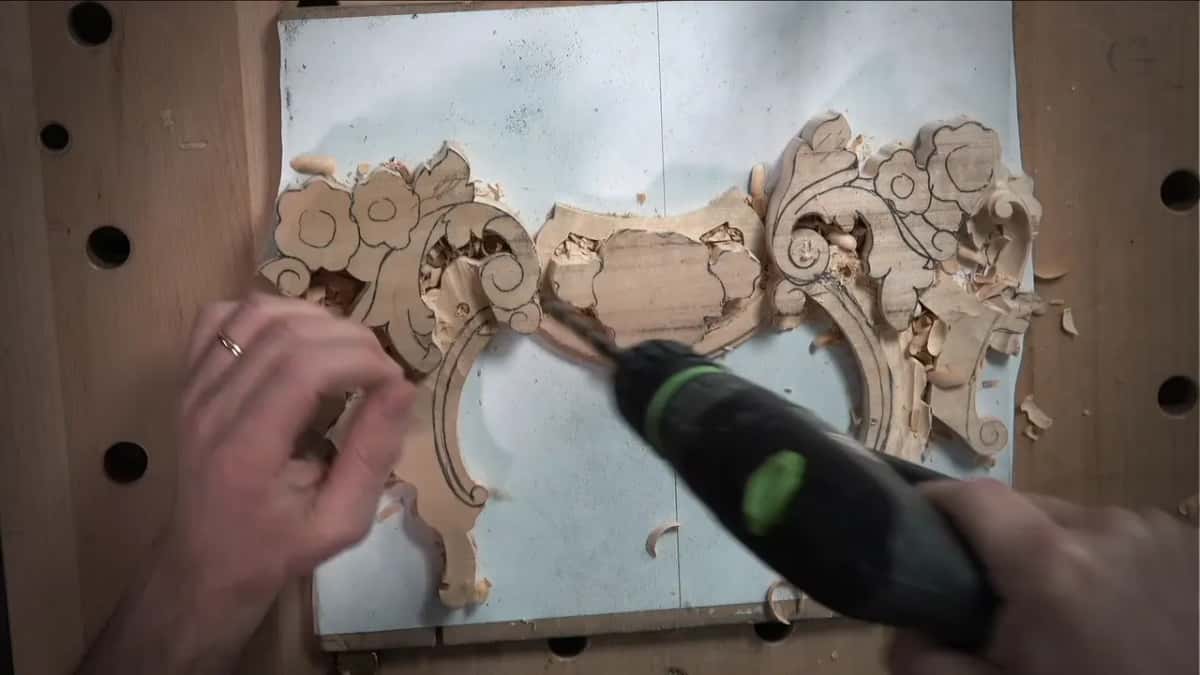
I drilled that one too, and again I didn't want to overdo it. The opposite side was not too convenient for me, so I just eyeballed it, put the clamp back, and it looked like I was right there.
| Spot on the panel | What I read there, or what I did instead | How I checked |
|---|---|---|
| First high spot | a quarter inch left, then a hole of roughly 6 mm | measured again, right there |
| The other side | a quarter inch or so on this side as well | same result, after the clamp came out |
| By the final volute | 10 mm, near 3/8 in, maybe not exactly | drilled it, careful not to overdo it |
| Its opposite side | no reading, because it was not too convenient for me | eyeballed it |
| Second volute | a slope to about 5 mm, just under a quarter inch, made with a normal skew | other side right away |
What does the gap at the limiter tell you?
How close you are. My needle goes all the way down the hole, to the bottom of it, and I'm not pressing too hard, so it's actually hitting the floor.
Then you look at the gap of the limiter, or whatever you call that thing. It just limits how it moves.

On my first hole there was maybe about half a millimeter (about 0.02 in) left, maybe even less. I got a piece of paper and placed it right there, and the gap was just about paper.

I could go all the way, but I don't need to. It's close enough for me, and I still have to shave that surface.
At one point in this lesson I lowered my needle and didn't fix my limiter, and I caught it right there on camera.
Which gouges take you down to the holes?
On this shell, whatever fit the space at that moment. I started with a number 11 gouge of about 5 millimeters, 3/16 of an inch. The reason why, that shell is going to go uphill, and even closer to the line it still goes up.

Carefully I got closer to my future volute, because I didn't want to damage the side of it.
Then the tool just didn't fit any longer. I have some antique tools I kind of like, and I took one of the Herring Brothers. I kind of like that brand. It's about one-eighth of an inch (about 3 mm), maybe slightly bigger, but it fits perfectly.

When it got too tight for that one, a number seven of 14 millimeters, about a half inch, took some material out. Then came a number 11 of 3 mm, an eighth of an inch, closer to the side, with short strokes. Even that was a little too big for one section, so I went to 2 mm (5/64 in), and one and a half will work too.

Which tool keeps the wall straight on the way down?
A flatter one, with a straight-down cut. Keeping that line is really important for me.
I used a skew, such a wonderful tool, that works just like a knife, and what I like about it, you can use just the heel part and slice.
It's not the only tool you could use. A number two or a number three works too, placed 90 degrees down, with a mallet. Just make sure you don't undercut it. And you have to look whether it's 90 degrees or not, so you really have to use your eyes.

A bigger number two works even better. Bigger tool you have, much better result you're going to have.
Later I took a number two of 30 millimeters (about 1 3/16 in). Not that big, but still kind of huge. I walked it around so I wouldn't lose that line on the lower level, and I held it at 90 degrees, because undercutting there would be a big mistake.

Should you measure again after carving down?
I did, right before the slope. I knew this part would be lower, and right then it was kind of flat, so I got my pointing machine again and measured the height of that side of the volute.
It looked like I had already marked it before. I wasn't sure if I was there or not, so I double-checked, and I was right on the money, exactly at the spot. Just to see that it hits the surface makes me happy.

In lesson 10 I made the same check on another spot. Maybe I've got right too low, I said, and then I'd have to fix my first piece, which I don't want to do. But I was really close, a millimeter off, maybe half a millimeter (less than 1/16 in). Not a big deal. Still, I can't go lower than that, because going lower would be a big mistake.
Why take a big flat gouge up the slope?
A big one gives the smoother transition. Once the height was checked, my goal was a really smooth uphill pass, and I didn't draw anything for it. I just eyeballed it with a huge number two, 50 millimeters (about 2 in), though any flatter tool will work, like a number three.

People, the bigger tool you have, the quicker the job. It's always like that, just like flying an airplane. You're able to do it with small tools, but for a really flowing transition uphill, the bigger the tool, the more chances it'll be much nicer.
And yes, I lose probably all my markings doing that. Which is okay. I can remark it.
Next I drew the 6 mm volute again, the same as on the first side, and took the outside with a number two of 12 millimeters, half an inch or so, upside down, little by little. Can you hear how sharp that tool is? A really sharp tool leaves a beautiful, smooth finish.
After it came a 3 mm number 11 for some more cleaning. I don't want to go too crazy there, because there is not much material left. I'm already at the level of that earlier pass, and if I went a little deeper, I would make a huge mistake. The 1 mm number 11 (about 1/32 in) after it was not to make it deeper. It was just for cleaning.
Can you carve a slope to a measured depth?
You can, if you read the slope off the first piece. On the second volute I looked at the first piece I did and saw I had created some sloping there. Not much, but some sloping.
I measured the height first. Again, just make sure I'm not making the same mistake, I said, and the height was perfect.
For that slope I took a normal skew, just for the change, and it still works really good. It went down to approximately five millimeters (about 3/16 in). That's a really big slope. I did the other side right away, because that way I'll remember exactly what is going on.
When I checked the original piece in lesson 5, there was no sloping in the spot I was working, which was a good thing. I love slopes, don't get me wrong. But sometimes they just create some kind of confusion.
What keeps a long pass steady when you are close to the floor?
Your whole body, and a left hand that stays put. With the long cuts I push not with the hands but with my whole body, and my hands stay almost at the same position toward the body. Just the same idea as if you would use a plane.

The camera doesn't show the edge working, but you can see I'm holding my hands really tight to my body.
Partway through this part I stropped a 6 mm (1/4 in) number nine on leather with mirror paste.

Left hand always solid. It's solidly placed on a block of wood, either on the background or on the design itself. That way you have a lot more control, for micro cuts with really precise control.

The long slope down took a big number seven, 28 and a half or 30 millimeters (roughly 1 1/8 in). Two millimeters doesn't make a big deal. I attacked that from the opposite direction next, which made more sense.
Why leave wood for the undercut?
For the shadow. I leave some space for the undercut, and I always do undercutting, even on those volutes, even on the panels. It's going to cast some shadow, and it'll look much better, even if it gets pretty close.
Is a drilled hole right for every spot?
Not always. In the Hashemi Flowers course, lesson 45, I left one spot without a hole on purpose. I don't have to drill everywhere.
I still wanted to connect this one to that one. If I create the hole, I have to bring all things to the hole, and I'm going to lose my connection point.
I said there that holes everywhere would not look as nice or as natural. Some petals are closer to each other, some are farther, and a hole creates really big spaces.
On the small flowers of lesson 13, the hole came first. Step number one in that sequence, I said, would be to drill the center hole, and it went a quarter inch inside (6 mm).
And in lesson 14 the pointing machine gave me a height I had marked already, with about four millimeters to take out. Maybe three millimeters, one-eighth of an inch.
Where does this lesson sit in the course?
This is lesson 4 of Carving Floral and Molding for the Panel. Lesson 1 starts the panel, lesson 3 comes right before this one, and lesson 5 right after. The panel belongs to a bigger Venice room project, a real-life project, and the Venice Room course holds a lot more of that Venetian wood carving.
With Access you get the full videos of all fourteen lessons on this panel. You'd like your depth to be a number and not a guess, right? Then drill to it.
How it's done
- Read the first piece. Set the pointing machine tight, then touch the needle to the high spots of the convexes on your finished first piece. Their height is your depth.
- Drill to the reading. My first high spot had approximately a quarter inch left, so the hole went roughly six millimeters deep, and I watched so I would not overdo it.
- Check the gap at the stop. Drop the needle into the hole without pressing hard. A gap about as thick as paper was close enough for me.
- Add a few more spots. Repeat on the other side, then near the final volute, where it came to about 10 mm (3/8 in).
- Carve down toward the holes. Start with a gouge that fits, change it when the space gets tight, and hold the wall straight down so you don't undercut it.
- Measure before the slope. Check the height again with the machine, then take the uphill transition with the biggest flat tool that fits.
Frequently asked questions
Can a hand drill replace the pointing machine?
Yes, for the hole. On this panel I said you could use just a hand drill, which is absolutely fine. The height still has to be measured, and I read mine on the finished piece with the machine before any bit touched the new block.
What is Mirror Paste?
Mirror paste is a stropping compound. On camera I called it one of my favorite compounds lately. I put it on a piece of leather and stropped a small number nine before working around the volute. Afterward the gouge grabbed really nicely, really sharp.
Is the pointing machine the only way to measure depth?
No. I said there are multiple ways to do those measurements, but I found, for me at least, the machine is one of the best methods. Close to the end of the lesson, measuring the original piece again, I said much the same thing.
What to carve next