

Alexander Grabovetskiy, woodcarver, School of Woodcarving · Published 2018
Where does the main design go on a carved furniture panel?
Quick answer: Furniture panel design is the work of placing the main idea before any carving starts. On this purple walnut panel the main cluster grows in two focal points, found with the golden ratio, about six parts out of ten. The hero takes the top point, and its opposite, the anti-hero, takes the bottom one.
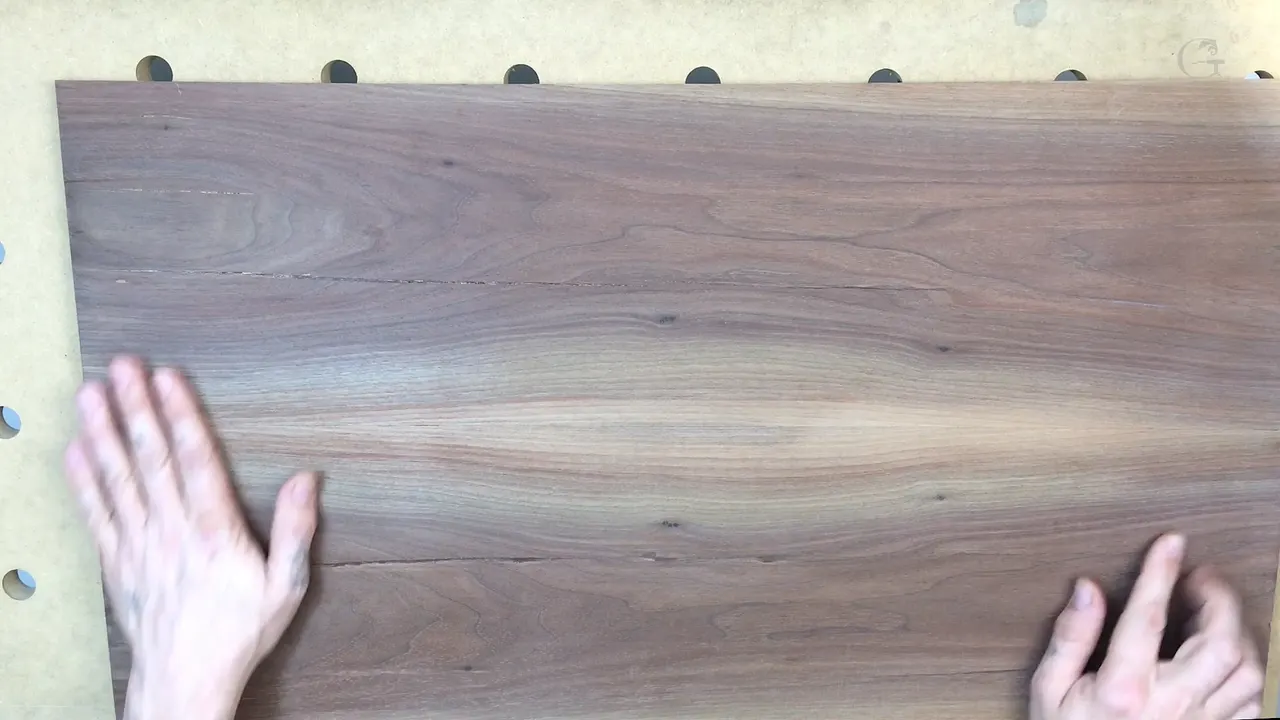
Furniture panel design is deciding where the main idea of a carving will live, before the first chip comes off. A pair of focal points carries it. On this walnut panel I find both with a pencil and a measure, put the main cluster, the hero, on the top one, and give the bottom one to its opposite, the anti-hero. That is a really important rule.
Would you like your next carving to be more than a practice piece? And to know where its main idea goes before you ever pick up a gouge? Then the drawing comes first. There is no carving in this lesson. I glue paper on the board, decide which end is the top, find the golden center and choose my hero, and the gouges wait for later.
What this first design lesson settles on the board
- Purple walnut, only 10 mm (3/8 in) thick, resawed and glued like a book so the cathedral grain repeats on both halves.
- The plan is low relief, no deeper than 5 mm (3/16 in).
- Paper goes on first.
- A golden center sits at six parts in ten, simple enough to find with a measure and a pencil on any board you have.
- The hero takes the top focal point, and the bottom one belongs to the anti-hero.
Why did a leftover walnut board become this panel?
A piece of wood that beautiful I didn't want to throw away. Let me tell you a story. I promised before that we would carve a panel in this style, like Chippendale style, and I don't want to repeat myself or do exactly the same panel again. Some unique walnut was left over in my shop.
That walnut came from a project where the whole house was made of it. It was special walnut, different from black walnut and from European walnut, and more like purple. Purple walnut. I know some of you never saw it, but there is such a thing as walnut with a purplish color. The doors in that house were about 2 7/8 inches thick, almost three inches (73 mm), and every baseboard, every casing and all the furniture came from the same purple walnut.
Some of it I couldn't use in the project. You can see splits inside the wood. What I got is a panel about 10 mm, three-eighths of an inch, and I thought to myself that it's a beautiful piece of wood I'd like to use for a furniture panel.


So I resawed it and glued the two boards together opposite each other, like a book match. Now the color moves out from the lighter part in both directions. There are cathedral movements on this piece too, beautiful ones, and because of the way I glued it one cathedral repeats itself on the other side, while on the opposite side another cathedral faces toward the first. It's balanced.
My guess is the cracks won't be a big problem, hopefully. If there is a problem, it's a good challenge. Later, in lesson 15 of the carving stage, I say it again on camera, that this one is not normal walnut, more like purple.
How thin is the panel, and how deep will it be carved?
Only about three-eighths of an inch thick, which is 10 mm. It's 27 1/4 inches long and 15 1/2 inches wide (692 by 394 mm), and you can use a panel like this horizontally or vertically, but in my case I'd love to see it go in a vertical direction. My plan is not to go deeper than three-sixteenths of an inch, 5 mm. Really shallow. Really low relief carving, and still I want the effect of a three dimensional world.

Look at the colors. Purple, somewhere pinkish, and I see some greenish color too. I'm probably not going to put any stain on it, except maybe to tone it inside the shadows for that three dimensional effect.
The style I want to keep is the style of the originals, I'd say probably the end of the 18th century and the beginning of the 19th, with some floral design and some Baroque style. Some people call it Chippendale. To me it's not necessarily true Chippendale, because I'd say hundreds and hundreds of wood carvers around the world used that shallow carving technique in the 18th and 19th century and the beginning of the 20th.
What makes a carved panel different from a photo or a painting?
The third dimension. Photography and film, drawing, oil or acrylic paint on a canvas all work in a two dimensional world, and wood carving works in a three dimensional one. So it also depends on how deep your chisel travels, how you create the shadow and how the light will hit. You have to consider all that. I don't try to invent the wheel. I follow the rules, and I believe they are really important, whatever you compose, a photo or fine art or especially carving. Developing the final idea will take a little while, and we'll talk about it in this course.
What kind of bench lets the panel turn?
A board screwed to the plate of a carver's vise. I screwed my plate from the carver's vise onto the back side of an MDF board, and that board goes into the vise, which sits below on my table. Now it's my bench. I can still work on relief carving, but I can rotate the work, raise it, face it toward myself and work from opposite directions, and that's why I use the system on some of my carvings.


It's an excellent vise. But you do not have to buy that type of vise, because there are different carver's devices you can use. Get the idea. Take the surface you want to work on and screw the plate to it. Mine has 20 mm holes, three-quarters of an inch if you are in the USA, and clamps hold the work piece while I walk around it and rotate it.

Why glue paper over the walnut before drawing?
To get a perfectly white surface to draw and design on. I cut the paper oversized, maybe about an inch (25 mm) past the outside perimeter, sprayed photo mount glue on the surface of the wood and on the paper too, glued that and cut it around. Any paper will work. Normal printer paper is fine, in multiple pieces glued on top of the board.


A few different pencils are probably a wise idea. And of course an eraser. We're going to draw and redraw until we are satisfied with the final design.
Is the rule of thirds enough to place the main idea?
It's the simple way, and I could use it, but on this panel I want more. The first step, the first rule I follow, is to find my golden ratio, the principle of the golden center, and there is a simplified way and a more complicated way to do it. Thirds are that simple way, the one lots of photographers, cinematographers and filmmakers use. Divide your board in three equal sections one way and three equal sections the other. Where those lines cross are the four focal points.

I could do that. But my goal is a beautiful piece of art in a furniture style, and I'd say the best pieces in art throughout history followed the golden ratio rule. Different people named that rule differently. Fibonacci and Leonardo da Vinci both tried to define it. Today I want all the golden points, golden centers and golden lines.
| Way | What you do on this board | What I say |
|---|---|---|
| Rule of thirds | Divide it in three each way, and the four crossings become focal points | I could do that |
| Golden ratio, simplified | Split a line in ten parts and count about six | Approximately like that |
| Squares off the width | Carry the width down the length, then the 11 3/4 inch rest across | I've got an idea, approximately |
Which end of the panel becomes the top?
On my board the left side becomes the top, though it's not really critical. I want a vertical panel, like a panel for a door. A board with a single cathedral going up and no second one decides for you, because the cathedral always goes up, so the end it points to is the top. Mine has two cathedrals facing each other. I just decide.

The movement of the view comes before the golden ratio, too. West and east read a picture absolutely differently. A Western viewer, European or American, reads left to right and starts in the left corner, going downhill, while a Middle Eastern viewer probably starts on the right side and moves the other way. Lesson 5 comes back to that downhill movement.
My background is between Asian and Western. I'm Russian. Russia has an Asian part and a European part, so I'd like an idea that will be pleasing for both worlds, and I'm not sure if anybody tried that before.
How do you find the focal points on this board?
With squares, measured from the width of the board. The golden center comes first, and by the way, it doesn't matter what proportions your board has, you can still find the really true golden center. There's a major Fibonacci number and a minor one, and I work on the minor number. To simplify it, divide the board in ten. About six parts out of ten, or to be exact, 0.62 of the 100.
On a leaf in floral and molding lesson 6, I put the same split another way. "Again, as you know, 40-60 rule. So we've got 62% and 38% on this side. It's a golden ratio."
My board is 15 1/2 inches wide (394 mm). I measure that width down the length, exactly, and draw my line, because I'm trying to find the true square. The top is here, and my focal point will be somewhere in that area. Then I take the distance between that point and the edge of the square, 11 3/4 inches exactly, which the note on screen gives as 29.85 cm, and I transfer it across. So there is my second square.
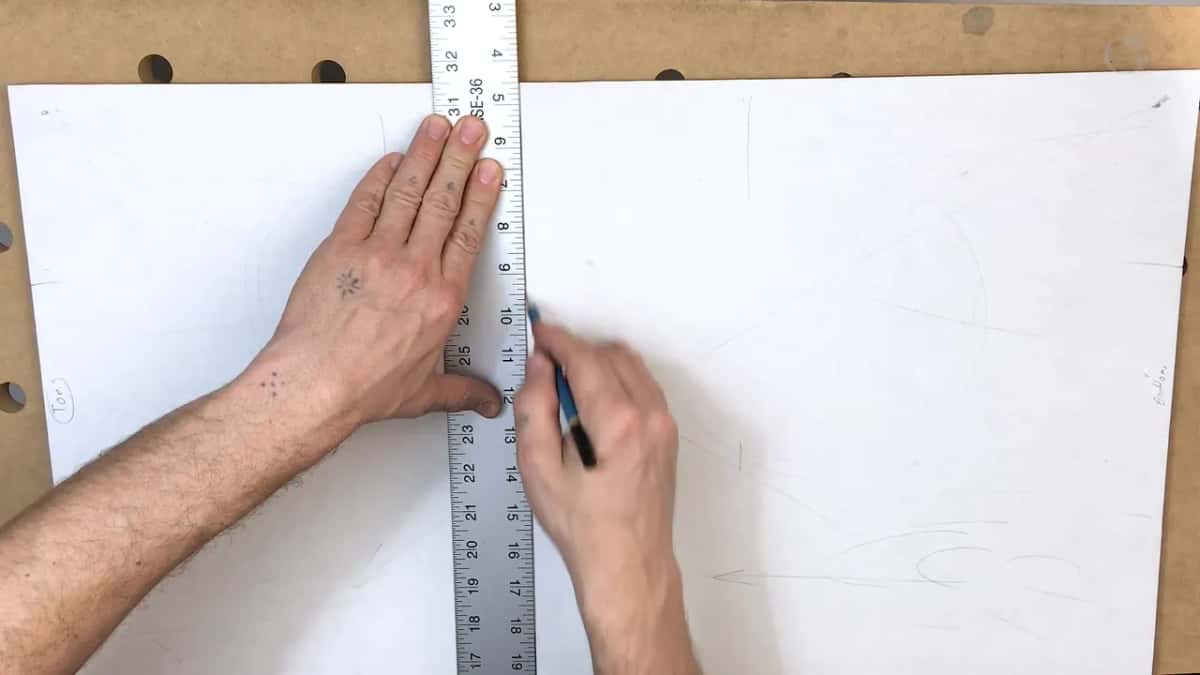

The opposite side gets exactly the same, because the other focal point goes there. Two squares now. One measurement is kind of hard to take, and I get about 3 11/16 inches (94 mm), which I transfer on both sides before I draw a line.

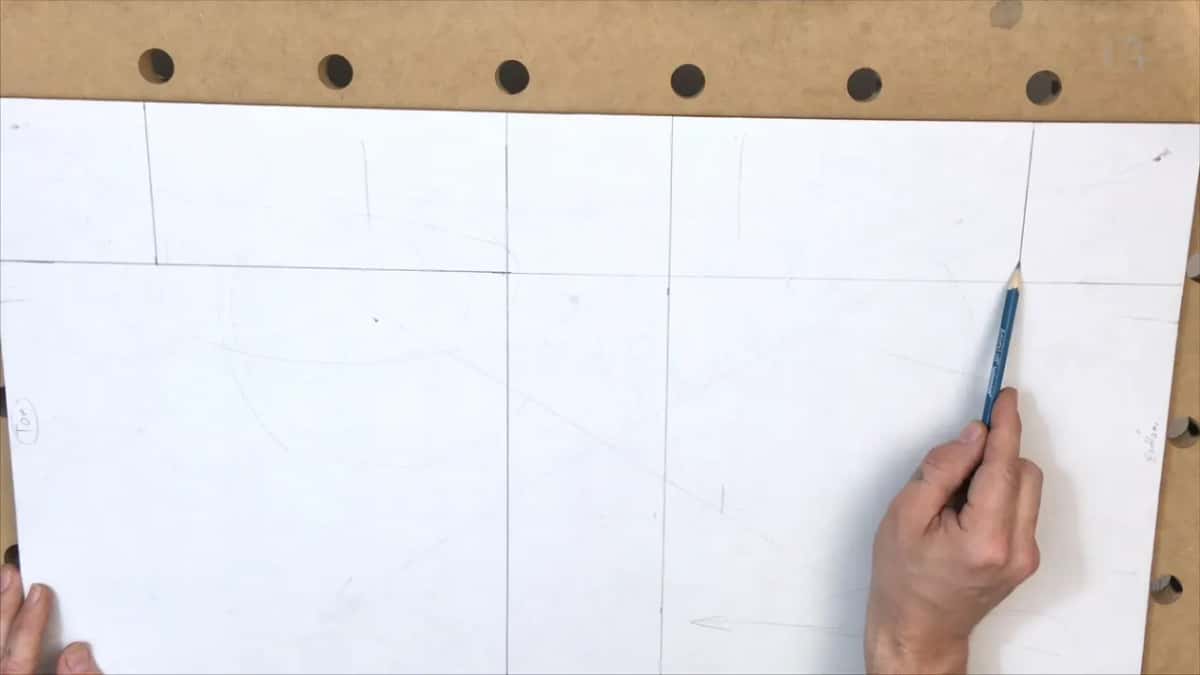
We do have a little bit of a problem. The board is not really proportional, so I can't draw another square, and another, and another, until I find the exact point. Still, I have an idea where they are, approximately. Here is focal point number one, and there is number two. In lesson 3 I come back to it and say it plainly, this board is not perfect, like a golden ratio.
What goes on the hero point, and what goes on the anti-hero point?
The main cluster takes the hero point. I've got my top and my bottom, and the main idea will develop in those two focal points, which is also a really important rule. Like in every movie, there's always a hero, the main character, and there is the opposite of the main character, the antagonist or anti-hero. I have to choose which cluster will be which. Since it's the top, I want my hero on top of the anti-hero. That is my hero side.
We can always find the spiral movement in this overall design, and that's not that complicated to do, once from one side and again from the opposite side. Now we've got the main lines. I'm not happy yet, though. I don't know exactly yet how it's going to look.

One more thing to consider. If you plan to use this panel in a piece of furniture, it will sit inside the rails and stiles, with a frame around it.
Can one panel have two heroes?
Only one hero. I teach it the same way in Principles of Design in Wood Carving, lesson 4. "Remember, there should be only one hero, only one main idea, one hero." The next questions are where the antagonist sits and which of the points that are left will support which.
In lesson 3 of that course I show a flower design where the upper part dominates, by design, by choice, on purpose, and the secondary part, the antagonistic one, stays just secondary. A little later I point at that antagonist part. It's empty. If I put a bunch of flowers right there, it would be off, a busy design.
On the Vase with grape leaves I measured the center with the golden ratio calipers, and if that one is the main idea, a hero, I can make the small one like an antagonist, like an anti-hero if you wish.
What if your board is a different size?
Follow the same steps on the board you have. Don't panic if your board isn't that size, because I will provide the layout and the pattern for what I'm carving, but don't get stuck on that. The idea is to learn to carve and to design, and the design goes before carving. With a smaller board, follow the steps, follow the principles and rules, follow the laws of the design, and you'll get really good results.
I believe every furniture maker who works with antiques, or reproductions of antiques, should probably know that process, how they did it. When it's not a custom order and I have room to design, I love that. I get a chance to design something that wasn't carved before me.
Lesson 2 is the next step, and the whole drawing lives in the design course. Then come the carving stage and Part 3. If you want to carve it with me from the first pencil line, here is where to start.
How it's done
- Glue paper over the board. Cut the paper oversized, about an inch all around. Spray photo mount glue on the wood and on the paper, glue them and trim around the edge.
- Mount the board so it turns. Screw the plate of a carver's vise to the back of an MDF board and set it in the vise. Holes of 20 mm (3/4 in) take the clamps.
- Pick the top. One cathedral pointing up marks the top, and with a pair like mine you decide for yourself.
- Square off the width. Carry the width of the board down its length and draw the line, and you have a true square at one end.
- Square what is left. Measure what remains beyond that square and transfer it across. Then do the same from the opposite end, so you end up with two squares.
- Mark the focal points. Set down the first and the second focal point. Where the proportions are off, they will be approximate.
- Choose the hero. Put the main idea, the hero, on the top point, the anti-hero on the other, then find the spiral movement from each side of the design.
Frequently asked questions
Do you need the exact golden number for a carving layout?
Six in ten gets you there. In this lesson I name a major and a minor Fibonacci number, work on the minor one, and then simplify it, counting six parts in ten, approximately, or 0.62 of the 100 to be exact.
Can I use this layout on a smaller board?
Yes. Follow the same steps on the smaller board, and follow the principles and the laws of design. I provide the layout and the pattern for the panel I'm carving, but the idea is to learn to design as well as carve, and design goes before carving.
Is a carved walnut panel meant for furniture or as art?
Either one works. This panel can be used in furniture, and it can be used just as a piece of art, so it's up to you to decide. If it goes into a piece of furniture, plan for the rails and stiles and the frame around it.
What to carve next