

Alexander Grabovetskiy, woodcarver, School of Woodcarving · Published 2021
How big should the pipe be on a Byzantine acanthus leaf?
Quick answer: A Byzantine acanthus pipe is meant to be huge, an over-exaggerated convex running from every eye. I make it with two deep concaves, one on each side of its middle line, then bring the ridges up with a number 2. Last, I knock it down a little so it's not overwhelming, and it stays higher than the middle part.
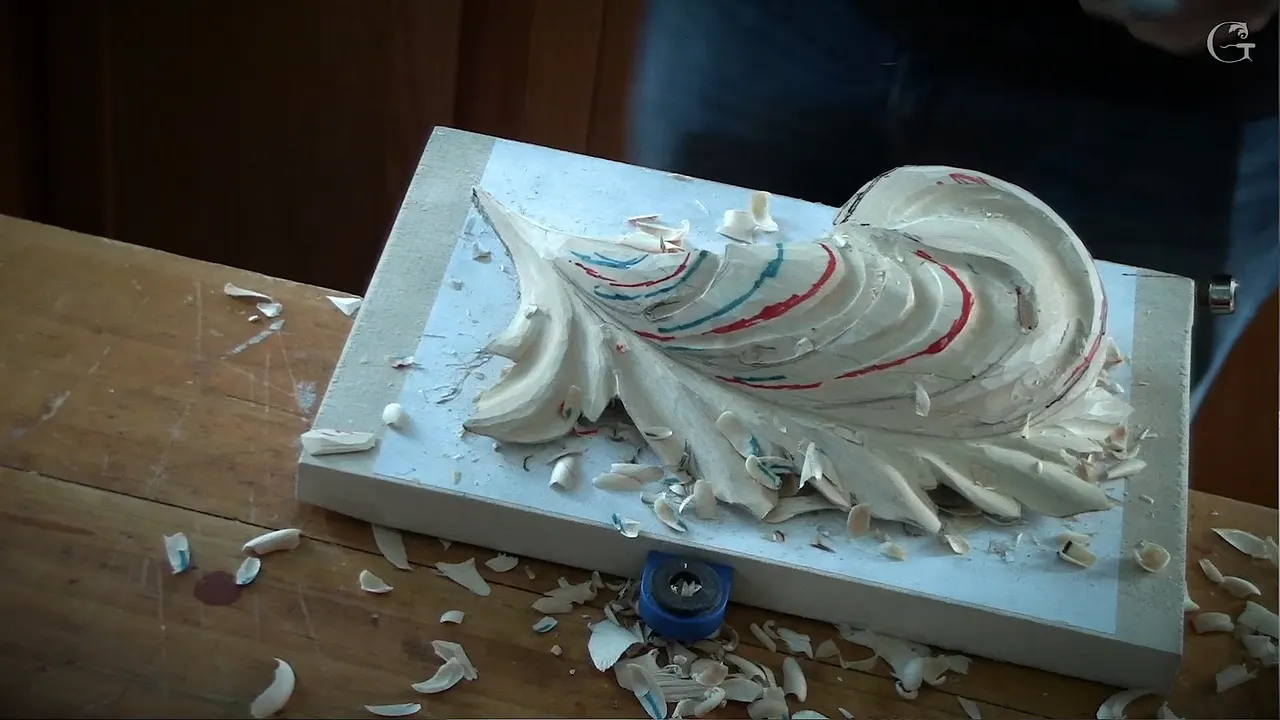
The pipe on a Byzantine acanthus is a raised convex that runs out of an eye, and on this leaf I make it big. We're creating big here, I said in lesson 8. In this case, it's going to be a huge pipe.

Did you keep the first layer thick? Are the eyes on your leaf carved? Then you have the wood for a pipe this size, and this lesson is where it gets dug. You'll see how far down I went with two concaves, which tool did it, and why I took a little back off at the very end, so the pipe doesn't take over the whole leaf.
The big pipe in six lines
- Pipes start and end at the eyes, and my leaf had three main eyes for now.
- Each pipe gets a middle line running to the central line, placed with the 60-40 rule and made curly.
- Blue means the surface goes down into a concave, and orange or red means it stays up.
- We had a number 9 at 10 mm (3/8 in) for the concaves, and a bigger one is even better.
- Go deep without fear, because we're after all the shadow we can get.
- The two ridges came up into one big convex under a number 2.
How big does a Byzantine acanthus pipe get?
Huge is my word for it, and I said it more than once. When I put the marker on the ridges, I said a big pipe goes there, and the same thing again right next to it. Near the end, wherever I saw an eye, I said we'd have a huge pipe like that.
A raised shape belongs to this style from the start. Back in lesson 3 I explained that different acanthus leaves have a different structure. Greek acanthus has a sharp V cut on the inside, like with the knife. The Roman leaf carries a concave there. And on the Byzantine leaf it's a raised up convex, and we want to be authentic to the true Byzantine, so the middle part becomes convex.
That same lesson I already called it an exaggerated pipe, before that pipe was carved. During lesson 4 I said it again while I worked: if I need to go a little deeper, I'll do it, because I really want to see an exaggerated pipe. And a pipe is a convex too. Middle is a convex, and a pipe is a convex, I told the class.

Where does each pipe start and stop?
At an eye. Every eye is a start, or an end, of the pipe, and I said to keep that in mind. One, two and three. Fibonacci, right? We're going to have more later, but right now there are three main ones.
From each eye I drew the middle line of the pipe going all the way to the central line, and blended it nicely. It's the same rule as on the Greek leaf in Greek lesson 4, where I called the pipe the part going from that eye toward the center line. One deep eye I'd carved earlier in lesson 8, after outlining the main boat shape again, and a channel went to it after that.
During lesson 7 I said we won't go that far yet, the pipe comes later. Later is now.

Where does the middle line of a pipe go?
Wherever the 60-40 rule puts it, again. For each division I took one point and the other point, then moved the line approximately 60 percent of the way along. Whatever split I had, I said, we're going to repeat on all of that, and blend the whole movement together. Then curl it. Just curly that, I said, make it curly.
The front view won't tell you. Early in the lesson I checked with everyone whether what I had looked almost like 60 on one side and 40 on the other, and someone said yes. But when you're looking straight, you don't know that. When you look from the side, then it makes sense.

One part wasn't shaping the way I liked yet, so I rolled it a little bit backward. Any flatter tool will work for that. It meant some wood had to come out lower, and my middle line moved a little too. After that I showed how it looks from all the points.

What do the blue and orange marks tell you?
Red, or orange, is a convex. Sunshine. Blue is ocean. The colors work the way they did back in lesson 1, and on this leaf the blue goes where the concaves for the pipes and the center part will be dug. Those concaves all have to follow the center line and fall right there along it.

Before I dug anything, I let the class make a picture, and I made one too, just to keep an archive. If you're smart, you have a smartphone, I said, and then, it's not like that. Don't get me wrong. I'm a happy person. After the picture I put the marker on this ridge and that ridge, just so you'd remember they have to be high ridges.

Which gouge digs the concaves beside the pipe?
We do have a number 9 at 10 mm (3/8 in), I said, and if you have a bigger one, it's even better. A big one, like three-quarters of an inch (about 19 mm), is a really good idea here. At one place I said I probably have to switch to a smaller one, and while you dig, it's a good idea to work with the grain sometimes.
The number 9 did the roughing too. For lesson 2 I told everyone to get their biggest number 9, whatever they had, and mine was three quarters of an inch, 19 millimeters or so. For the small pipes in lesson 10 I said I could probably take a number 9 and 10 millimeters, the same idea, the same gouge and the same job.

How deep do the concaves go?
Deep. Big concave, I said, and don't be afraid. I dug, and I kept saying the same thing another way: don't be afraid to be too deep, because it's supposed to have three dimensions. We are after all the shadow we can get, in relief like this.

With the tool still in my hands, I dug the next concave right away, exactly the same, just on the opposite side of the center line. I didn't have my multi-camera setup that day, so on the screen you only get an idea of it. Again I told them not to fear the depth. We really want to see that.
When both were in, I looked and said I had really deep cuts. Maybe not even deep enough yet. Later, once the pipe was rounded, I said maybe some of you thought, wow, that is deep, when I went in the first time. And it was deep. But now it made the beautiful pipe.

Why is there enough wood for a pipe this big?
We kept it. We have lots of meat, I said, and we have thickness. That's why we didn't get the first layer all the way through.
Back in the roughing lesson I said it plainly. Please keep that sloping. Don't spoon it, don't dig like a dish in this area. We need that meat, we need that material for the later development. We're still going to work on the concaves and convexes, I said, please, if it's not too late.
This is where that meat gets spent. Near the end, with the pipe standing above the middle part, I asked everyone. See why we need all that meat?

How does the ridge turn into a pipe?
I brought everything up until those two ridges became high spots. A flatter tool does it, and a number 2 worked in this case, to blend it and make a convex. That becomes a big convex.
If you have a knife or a skew, it's exactly the same operation. Just attack it from the right point. I didn't rotate the board for that, because if I rotate, you won't be able to see it. But pretty much, it becomes a big convex.
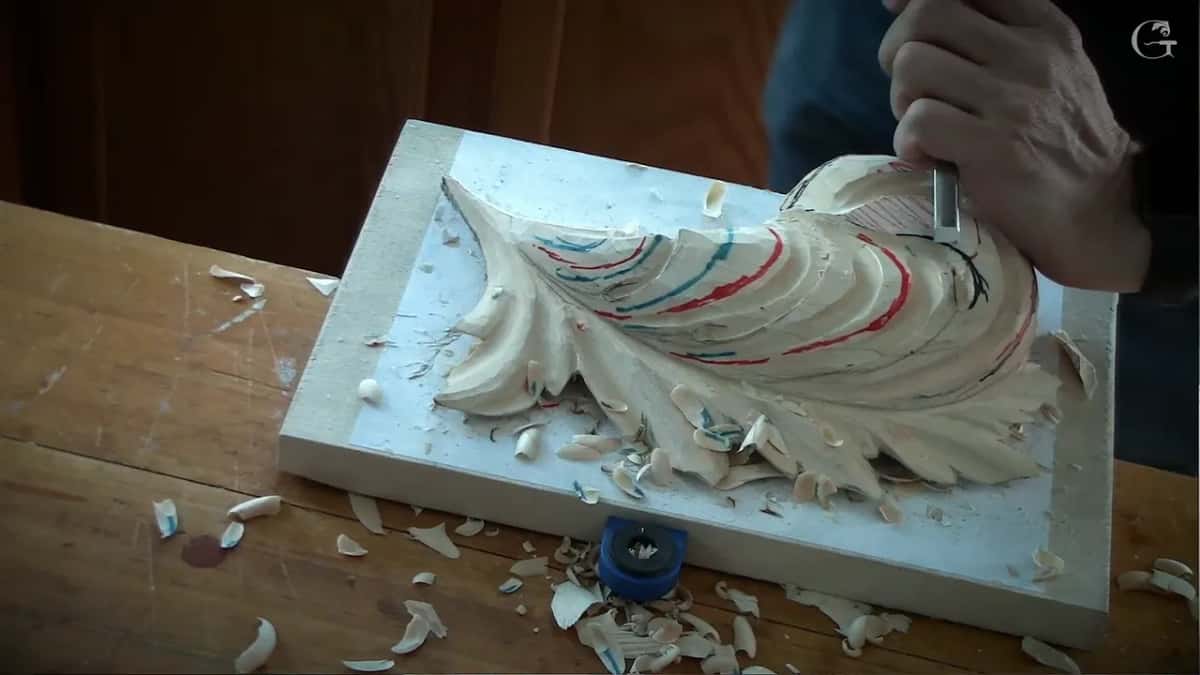
I took it right to the ridges, and blended, and blended, and blended. Then the same tool I'd used before got rid of the mess I had just made. After concave, we're supposed to have a convex, I said. Concave, convex, concave, convex.

Which parts go up and which stay down?
Both ridges and the pipe go up, and the concaves and the middle part stay lower. Here is each part of the leaf as lesson 8 left it.
| Part | Work | Height |
|---|---|---|
| Each eye | Where a pipe begins or ends, with three for now | Opened earlier |
| Both concaves | Dug by a number 9 along the middle line, one on each side | Deep for the shadow |
| The two ridges | Marked high, then raised by a number 2 | High spots |
| Main pipe | Blended into a big convex, then lowered a touch | Above the middle part |
| The middle part | Stays under the pipe, which is why we needed the meat | Lower than the pipe |
What keeps a huge pipe from taking over?
Taking a bit back off. We want to make sure it's not an overwhelming one, I said, so we can knock that down a little bit and keep that pipe higher than the middle part. I took it to show you, even though it wasn't perfect yet. It's just looking rough, but look.

Lesson 9 puts it this way. Between the eyes is a leaf, and each leaf has a convex, not really high like a huge ridge, but kind of smooth. The pipes in those sections are what rise up. Every eye is supposed to look like a water drop, and from each side of that drop the surface goes downhill, which creates the illusion of the pipe.
Where did the over-exaggerated pipe come from?
Once the first concaves had become a pipe, I said to everyone this is what I was talking about on Byzantine style and also Italian style. The most beautiful work in the Baroque style, I said, is Italian, the 16th century, just perfect. And that's what they did. Big pipe. Over-exaggerated pipe, if you wish to call it that.

One more difference came up in lesson 3, and it has to do with gold. I said that doing this acanthus in the Roman style, with that twist, would look really weird, with too many lines, not as soft, and not good for the gold leafing. Byzantine style, I said, took curvature to the extreme and curved it in a three-dimensional world. A really big improvement.
And of course, it has to be really smooth and nice. Just really beautiful, I said, and the same idea happens wherever you see an eye on the acanthus.
Should you carve toward yourself?
Never, unless you're a dentist. Don't do what I do, I told the class at the start of the lesson. Dentists always work this way, and you have to lock your arm.
I did it anyway, so you'd see it and so I wouldn't rotate too many times, and for the camera, of course. In reality, I still carved toward myself. Everybody does. I guess I'm breaking rules. Someone said they were worried for my soul. Don't worry about my soul, I said.

Watch the hands. I'm holding something absolutely different now, and I'm still locking, still holding on something, so that hand is solid. The other hand almost does nothing. It just supports, and I guide carefully, without pressure pretty much, but I still have to be solid.
Don't air carve. It's not an airbrush. Some people try that, and it just doesn't work. Always lock on something, and if it's not the block of wood you're working on, lock on whatever surface you can find.
Right after reshaping the boat, I was using a knife. The reason, I said, is that a lot of wood carvers don't know the use of the skew. Why in the world do they supply the skew? I mean, how do you use it? But the skew is one of the best tools you can have for wood carving. Fastest. You can do a lot with it. And again, I said, just recreate whatever channel you have to recreate.

My leaf was still rough when I held it up, with marker lines on the pipes. Next, lesson 9 goes back to the eyes and the convex of each leaf between them. If you'd like to carve this leaf with me from the first board, the whole Byzantine course is there, and Access opens it.
How it's done
- Find every eye. Each eye is where a pipe starts or ends. Mine had three main ones.
- Draw the middle lines. I ran each one right down to the central line, about 60-40, and made it curly.
- Color the concaves blue. Blue for every concave along the center line, and the marker on both ridges so they stay high.
- Dig one side deep. Number 9, 3/8 inch (10 mm), or bigger if you own one. Go deep, without fear.
- Dig the other side. Mirror it on the opposite side of the center line.
- Raise the ridges. A number 2 brought them up into one big convex. Then blend, and blend, and blend.
- Take a little back off. I lowered it a bit so it isn't overwhelming, but it still stands over the middle part.
Frequently asked questions
Can a carved acanthus pipe be too thin?
On my Byzantine panel, yes. I warned everyone in lesson 4 not to make a tiny, teeny part there, because it has to be wide, otherwise it's going to look weird. Then I took the tool upside down and started shaving it, after that ridge, which I wanted high as well.
Does the pipe get sanded smooth?
Really smooth and nice, I said in lesson 8, and on this panel I get there with the tools. Lesson 4 even has me calling sandpaper offensive. Later in the course I said that if you like to use a sandpaper, I'm absolutely okay with that.
Does all the extra material come off in lesson 8?
Not yet. On one side of my leaf there was a lot of material, and I said all of that will be gone, but not now. When it goes, we'll dig inside and make a deep shadow, and that's the fun part.
What to carve next