
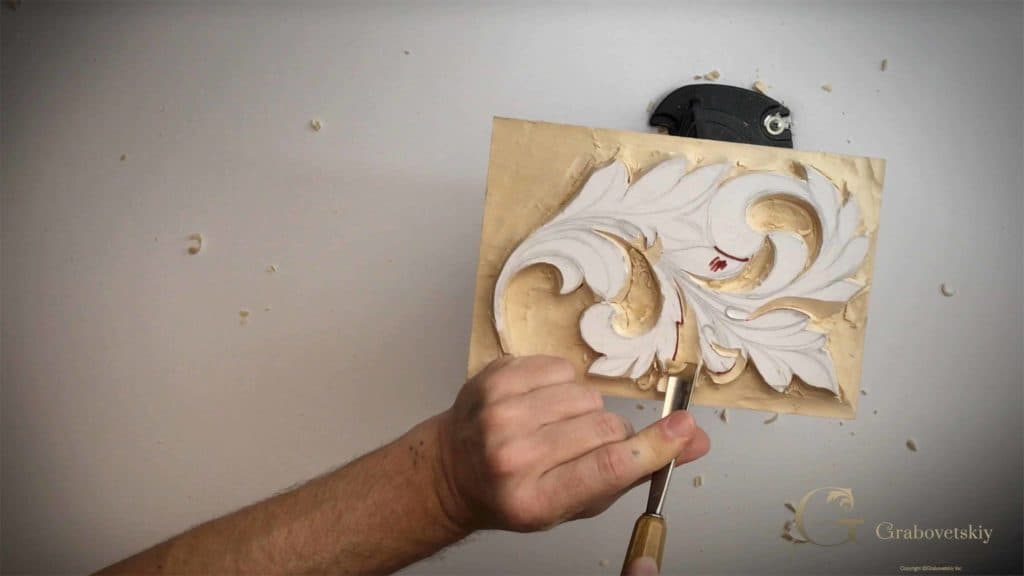
Alexander Grabovetskiy, woodcarver, School of Woodcarving · Published 2017
What are the eye and the pipe on an acanthus leaf?
Quick answer: An acanthus eye is a small spot carved clear to the background of the leaf. Its pipe is the part running from the eye toward the center line, and on my Greek leaf that pipe stays higher than the wood around it. I dig the eyes with a small gouge, or faster with a knife.
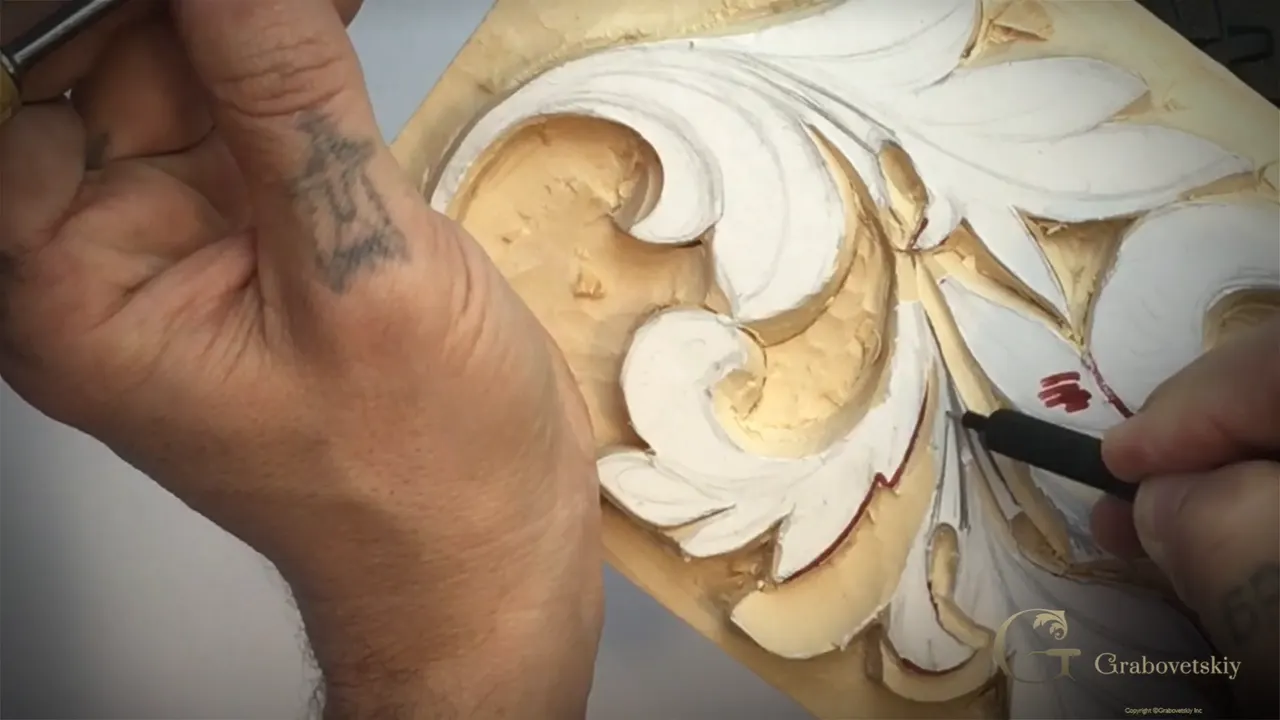
An acanthus eye is a spot on the leaf that has to go all the way down to the background, and the pipe is the part running from that eye toward the center line. That's how I put it as lesson 4 of my Greek leaf begins.
Can you hold a small gouge? Do you see the middle line on a drawing of a leaf? Then you can follow every eye and every pipe on this relief panel, and you'll hear why I say a number 11 is not a gouge at all. This lesson comes right after lesson 3, on the same leaf.
Eyes and pipes in six lines
- Every eye reaches the background, and nothing goes lower.
- A pipe starts at its eye and has to reach the center line, and on this leaf it stays above the wood around it.
- A small 11 or 9 digs an eye.
- A knife does it faster, especially on the micro eyes.
- Number 11 is a veiner, since a gouge only goes up to number 9, the exact half round, and anything past that turns into a U.
- One wall of a veiner groove carves clean and the other rough, so I keep the clean one on the pipe side.
- On a Greek leaf the curl stays high, since curls are what that style brought in.
What are the eye and the pipe on an acanthus leaf?
Two small parts of one leaf. We've got a few eyes to set on this one, a really small one, some a little bigger, and one more.

I named them the same way on the drawing of my Corinthian leaf. There is a pipe, there is a pipe, eye, eye. That's called a pipe, and that is an eye, I say.
In Corinthian lesson 3 I take my red marker to mark this one as my pipe, and that one too, and I say I want to keep each pipe as a high point, somewhat at the same height as the piece is right now. And on this Greek leaf, back in lesson 1, the pipes must go to the main flow line.

How deep does an acanthus eye go?
All the way down.
I say it at the very start, for the small eye and for the bigger ones alike. The background is a limit for the knife work, too. When I clear a few more areas, the knife goes in almost straight down, just slightly beveled, and I tell you not to overdo it, because we can't go lower than the main background.
On the other side the bevel is lower, so it isn't as deep. With bigger spaces it can make a really deep hole, which we don't need. Then the knife stands straight up and down to set my walls, and the waste comes out with it.

Don't worry if it's not too clean yet. Like I say on camera, this is just preliminary at first, and once the different planes are set, we still refine those eyes.
Which tool opens an acanthus eye?
A small gouge, or a knife.
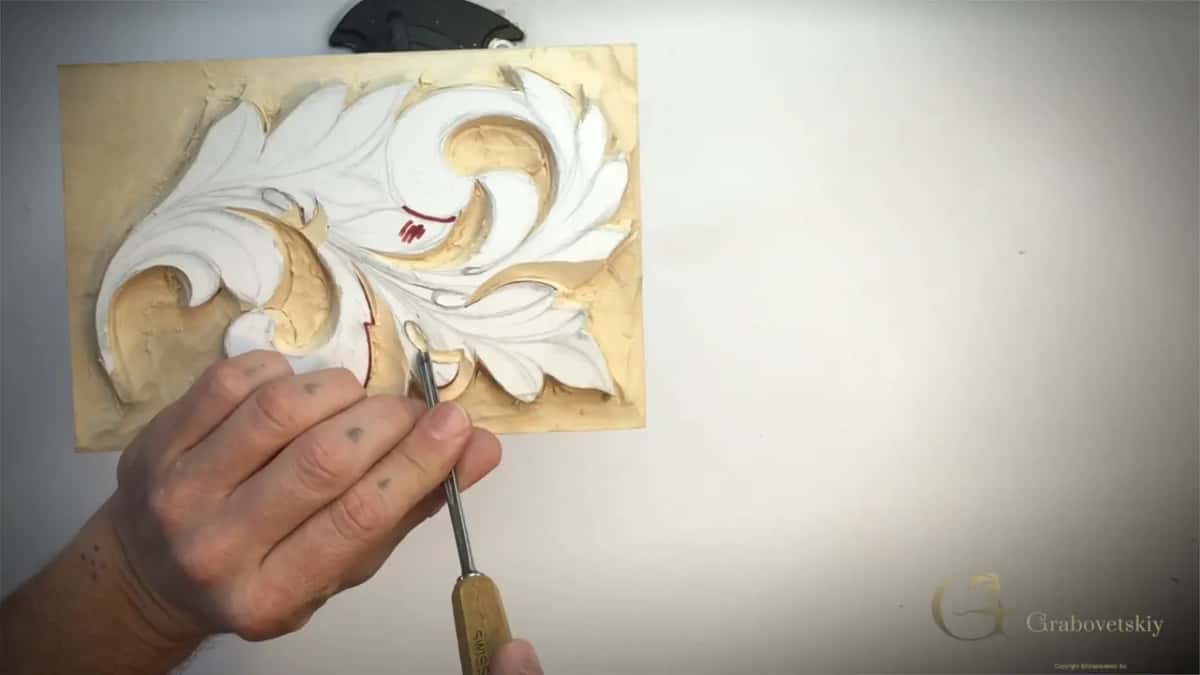
The safest way is a number 11, three millimeters, and you could use a number 9. I just dig in little by little, coming at it from different angles.

Mine is marked 11/3. That means a number 11 sweep and three millimeters.
In my April 2020 livestream on sharpening a veiner I walk through the whole numbering. The chisels are number 1. In the UK the gouges are numbers 3 through 9, in Europe they start at number 2, and after them come the veiners and then the V tools, number 12 and up to 16.
If you want to go faster, a chip carving knife is the second way. It's a really quick approach, and you're pretty much saving time, most of all on the micro eyes.

Nothing stops you from taking the knife deeper. Still, it's only there to remove as much waste as possible, and after it I clean with the 11 again. A 9 works, and an 8 will do also, as long as it's small enough.

Why is a number 11 a veiner and not a gouge?
A gouge stops at 9.
In part 2, holding the 11, I say it should not be called a gouge at all. It's a veiner. A gouge goes usually up to number nine, in the UK pattern and the European pattern, and it goes only to the exact half round, so you can easily place it, rotate it and make the perfect round.
After that you're already into veiners. If the wings sit higher than half round when you place the tool, it's more like a U shape, and that's called a veiner.

That livestream goes further. There I set a gouge on a board and turn it, and a good one will always end up at the same spot, so it makes the perfect circle. A veiner is like a letter U, and I say those tools were made for the veins of the acanthus leaf.
I also call the veiner a multi-tool, with a gouge part, the curvature at the bottom, plus a number 3 on each side. The UK still has a number 10, close to a European 9.
Why does one side of a veiner groove come out rough?
The grain runs two ways.
With a veiner the grain direction goes two opposite ways, so one side is carved against the grain and the other with it, and you just watch which side comes out cleaner. For me the clean side has to be the pipe side. Right now it isn't that important, but if you know which side carves cleaner, that helps you later with the details, and you don't have to do that work twice.
On the next pipe the grain changed direction. So the clean side moved to the opposite side, and I came at it from that side, which kept it cleaner. My number 7 in part 3 acts the same way, so I approach it from both sides.
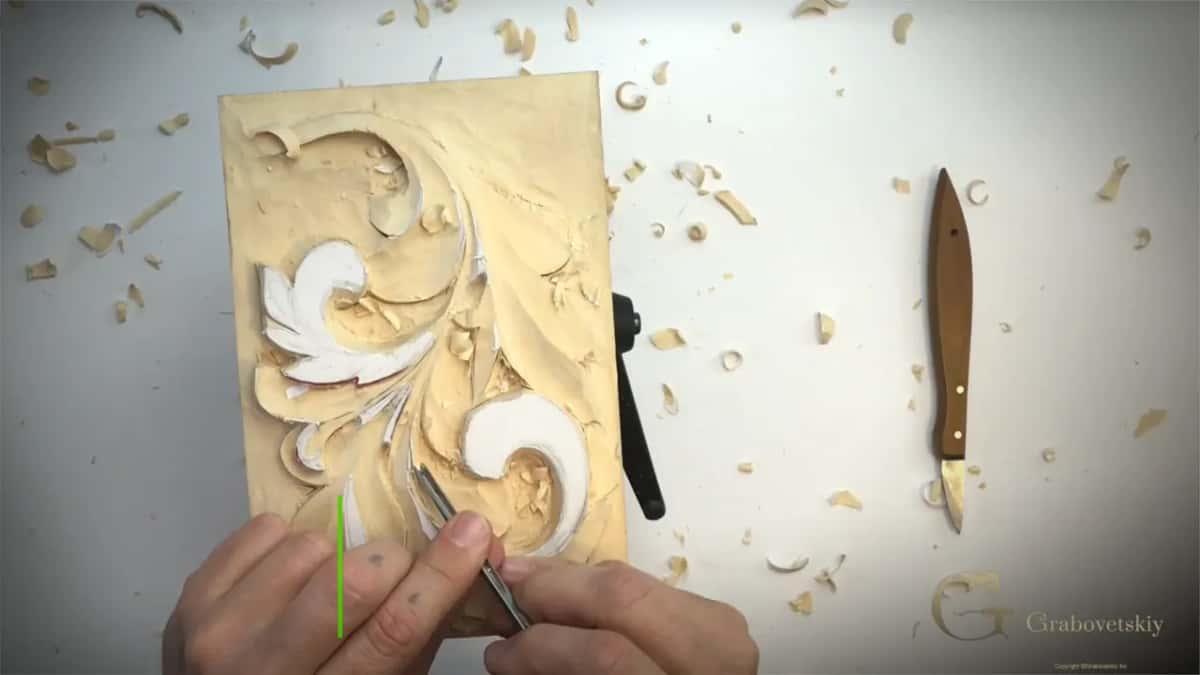
In a Q and A class on carving with the grain, I raise the same problem with a channel carved by a gouge or a veiner. One side goes with the long grain and one against it, so one wall is clean and the other really rough. If the channel is wide enough, attack one side, then the other. In a really tiny spot you may not be able to, and doing it once and then again costs twice the time.
Here's an honest line from this lesson, too. Watch the grain, it's a really important rule, although sometimes you can break it, and I broke that rule many times. Early in that first pipe I stop. That tool needs a buff, or a strop, I would say.
Where does an acanthus pipe have to go?
To the center line.
I find my center line first. The pipe has to reach it, so I place my tool on the left-hand side of that line and make one long pass, and each time I repeat it I try to make the pass as long as possible.

Then I rotate and do the same along my future pipe. At one spot two pipes come together in a V shape, and I make sure I'm not removing that part, because I still want it a higher plane on my pipes. I'll refine those two later. Where one part overlaps, a knife sets my shape again.
My Roman acanthus lesson 7 is where the pipes and eyes of a Roman leaf get refined, if you want the next step in another style.
Why lower the leaf around the pipes?
To give it a 3D form.
It cannot be a flat surface, so certain parts go down and certain parts stick a little higher than the others, and we need to figure out which one is logically lower and which one higher.

I'm working on the pipes and the eyes today. But you also need to understand the overall picture, the end result you're trying to reach. Here the middle section sits somewhat higher than its edges, and the sections around it go downhill a little bit.
And the pipe has to stay above. With a number 9, 5 millimeters, in my hand, I lower one more section so the pipe beside it sticks above that part of the leaf, just because that tool is the one I'm holding and I can do that.

I plan my Corinthian leaf the same way, with the center line as my high point and the sections going downhill from it. In that lesson I add that at this stage it's really important to follow the grain and understand it, and you can see that when I go the right direction my passes come out really clean.
Why use the same number 7 again?
It fits the pattern.
One section needs to go downhill, and for that I take a number 7, 14 millimeters. You would ask me why number seven. First of all, we already used this one, and secondly, in an area like that it fits perfectly in my pattern, so it can serve me a double task.
I'm careful not to overdo it, and I take the wood away until that plane meets that one. Later the same 14 mm 7 lowers the leaves going out toward the background, and I say make sure you're slicing.

In Corinthian lesson 3 I call the number 7 my workhorse on the gouges. Near the end of this lesson, holding a number 8, I even say a bigger gouge would probably help me more, but it's okay, since this one is right here on my workbench.
Five tools and the job each one did
Here they are, in the order they come up in the lesson.
| Tool | Job | Why |
|---|---|---|
| Small 3 mm 11 | Dug each eye, then ran beside the pipes | Safest way |
| Chip carving knife | Took the waste out of the eyes fast | Saves time |
| Big 14 mm 7 | Took whole sections of the leaf downhill | Double task |
| A 5 mm 9 | Kept one more pipe above its own leaf | In hand |
| Little 7 mm 8 | Put a line back, then cleaned the micro pipe | Cleans facets |
Why keep the curl high on a Greek leaf?
The curl is the focal point.
The idea is to keep this section higher. It's like a focal point in Greek style acanthus, because, like I said, it was the introduction of the curls or curvatures. That's the main difference in development, I would say.

So beside a curl, the big massive leaf has to go kind of lower, and I take it nearly to the background. Another leaf has to be higher than its neighbor, because I am trying to bring out my curls. Back in lesson 1 I say the introduction of those curls happened only in the Greek style, and the Corinthian didn't have that.

How do you keep a thin section from chipping off?
Please control your tool.
I place my hand to control it, and I also put my pinky finger on the wood, since there's a space for it there. Going along the grain, you tend to push too hard, and you can chip a section and it will fly out on you.
So my pinky and that hand steer the movement, and I'm using just my hand muscles. It especially applies to a really complicated carving like a Grinling Gibbons, with the tiniest details, almost weightless, like air. You can easily break that if you don't control the tool or don't have enough support.
Sometimes I have to do that anyway, just for refining those details.
That grain class goes further. In Gibbons style there's no such thing as carving with the grain, you have to attack from some angles, and the only solution is to keep your tools sharp. His style has a class of its own in my school.
What is a carver's cut?
A slicing pass.
Just watch what I'm doing, I'm slicing. I start on one point, which is on the right-hand side of my sweep, and finish on the left-hand side of my sweep, making sweeping passes. Some people call it a carver's cut, which is appropriate.
How small can an acanthus pipe get?
Really tiny.
Near the end I come to a micro pipe. That is my pipe, but it's such a tiny pipe, and I want to make sure it shows. I work my way in with the same tool, and I'm really careful about the grain as I lower the wood on each side.
Then a smaller tool, the number 11, three millimeters, brings that pipe out from both sides. A number 8, seven millimeters, cleans off some of the lines, or facets, and I lower the pipe just slightly.
What happens to the drawing lines?
Lost, then put back.
Don't pay attention to the lines yet. They're messed up right now, and we're going to set them again later on. Before I lose one detail, I place my pencil mark, then take a number 8, 7 millimeters, and set that line again.

Even if the main form looks really rough, it doesn't matter at this point. Still, try to keep those lines pretty close to the original one.
In part 3 I take a knife and subdivide what I call my marriage line, if you can call that line a marriage line. In that grain class I use the name with a bowl. As you carve it the grain changes direction, there's still going to be a marriage line, and if you just keep going you're going to split it, so you attack it from each side.
What glue holds the paper drawing on the wood?
Photo Mount, by Scotch.
That glue I used on this project probably became my favorite. It doesn't leave any residue on the tools like some other glues do, and it's really easy to peel and remove.

It's not cheap, though. One can is going to last you a couple of years maybe, depending on the projects, and it's a fine spray, not messy at all. Scotch is a 3M brand, and the logo sits right on the can.
The board under the paper is lime wood. In lesson 5 I say I really love lime wood, and some people call it a queen of the woods.
What comes after the eyes and pipes?
Undercutting, later.
At the end of the lesson I take one more section almost to the background and say we're going to undercut that later on, and it should make a beautiful picture overall. Undercutting has its own place in lesson 9.
Want to try the clean wall on the pipe side yourself? Every lesson of this Greek acanthus course is open with tuition, and it starts with the drawing in lesson 1.
How it's done
- Find the eyes. Look over the drawing first. Mine has a really small one, some a little bigger, and one more.
- Dig them in. Work a small 11 or 9 in bit by bit from different angles, or open them faster with a knife.
- Clean each one out. Follow the knife with the small gouge, and stop at the main background.
- Run each pipe to the middle line. One long pass beside the center line, keeping the clean wall on the pipe side.
- Lower the leaf beside the pipes. A 14 mm number 7 takes sections downhill, so each pipe stays above and the middle sits above the edges.
- Keep the curl high. Big leaves beside a curl drop close to the background.
- Put the lines back. Pencil a detail before you lose it.
Frequently asked questions
Can a knife replace a gouge on the eyes?
Only for the rough part. In lesson 4 the knife lifts the waste out fast, even on the micro eyes, and I can take it deeper if I like. Every eye still gets cleaned after it with a small gouge, an 11, a 9 or an 8 that fits the spot, before any planes get lowered around it.
What does 11/3 on a carving tool mean?
Sweep number 11 and a width of three millimeters, the way my small veiner is marked. Sweep first, size second. An 11 has a U shape, which makes it a veiner, while gouges end at number 9, a true half round.
How long does a can of Photo Mount last?
A couple of years maybe, by my guess on camera, depending on what you use it for. I call it not cheap. Still, it turned into my favorite, a fine spray that leaves my tools clean and peels off the wood easily when I want it gone.
What to carve next