
Alexander Grabovetskiy, woodcarver, School of Woodcarving · Published 2017
How do you refine the outline of a relief carving?
Quick answer: Refining a relief border is the stage where you redraw the major lines, then go round the edge again with straight down cuts and clean the waste. On my Greek acanthus I did it with a number 12 knife, cleaned the floor with a 1/8 inch (3 mm) grounding tool, and left another 1/16 to 1/8 inch for later.
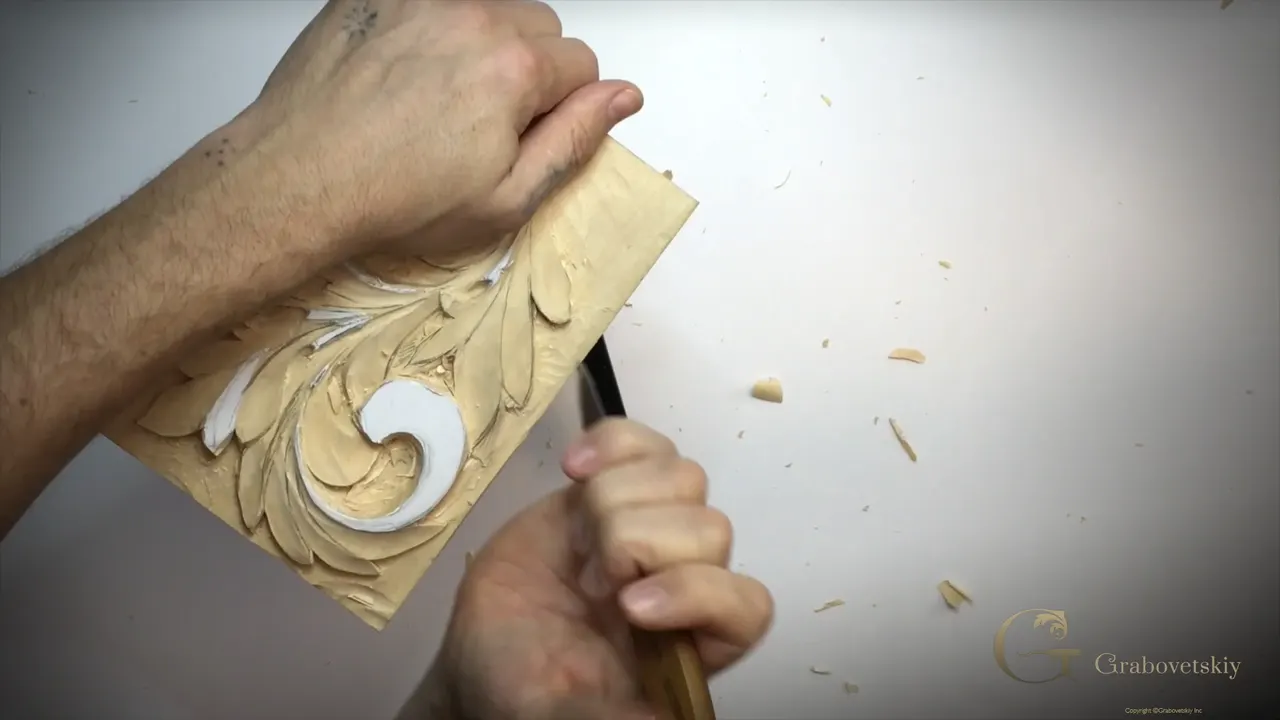
Refining a relief outline is going back round the border after the first rough work, redrawing the major lines and carving them clean again. On my Greek acanthus panel we lost a lot of fine details on the outside, so this lesson starts with the pencil. Overall I didn't lose too much. But some spots look like they need refining, and the leaf has to look the way we pictured it at the beginning.

Can you hold a pencil? Can you follow a line you drew yourself? Then you can do this stage, because in this lesson the outline comes down to a pencil line, a knife that follows it, and one small tool for the background.
Wikipedia's page on relief puts it well. When you carve relief into a flat piece of wood, the field is actually lowered, and the parts you leave seem to stand higher. That lowered field is the background you'll see me clean here, on a Greek acanthus, next to the knife I like and the V cut that goes inside the leaves.
What I do in this lesson, in six lines
- The main lines go onto the wood again first, and a fresh print of the paper helps you copy it.
- Flow lines come back before any edge goes in.
- A right-angle V tool can set the wall.
- My favorite for this is the knife, a number 12, any brand, because it reaches corners the V tool won't.
- Small grounding tools clear the floor, and mine is slightly bent.
- The Greek leaf keeps a V inside, often with no ridge at all.

Why redraw lines you already carved?
We lost fine details off the outside in the earlier lessons, and you need the picture back before any edge goes in. In the video I say probably the best idea for you would be to print the same paper, look at it, and redraw all the lines on the wood again, how they're supposed to look. I just eyeball it myself, pencil in hand. If I'm slightly off my original design, it's not going to be a big deal.

Spots like that one looked like they needed something refined.

Flow lines on the redraw
I call them flow lines. While I redraw, I need to establish my flow again, and every line goes to the same flow line.
It's the same idea I drew on paper in lesson 1. There I said every leaf, every section of this acanthus leaf, is going to go toward the center line of the flow. Now, four lessons later, I check the same thing on carved wood.

Is it too late to change the design?
I did, more than once in this lesson. One leaf I changed so it goes a little more underneath. Another one I didn't really like, and I said maybe I'd change that area and just remove that section. Near the end of the second part I still didn't like one detail, and I said I'd move one line this way and one line that way. Then, before the V cuts, I redrew some lines again, I didn't want to lose any details there, and one place had to go a little deeper.

I think it looks good. Now I need to refine the details on the outside, and there's a few different ways we can attack that.
Why the V tool isn't my first choice
One of them is a 90 degree V tool, exactly 90 degrees at the edge of the V. You lay one of its chisel parts right on the background, and the other one stands raised up. Then you go little by little.

Make sure you don't undercut yet. Don't zip underneath. Your wall should be really 90 degrees, and you work the V tool up to the line. It works, although that is not my preferred way, I should say, and I still give my preference to the knife.

Why I reach for the knife instead
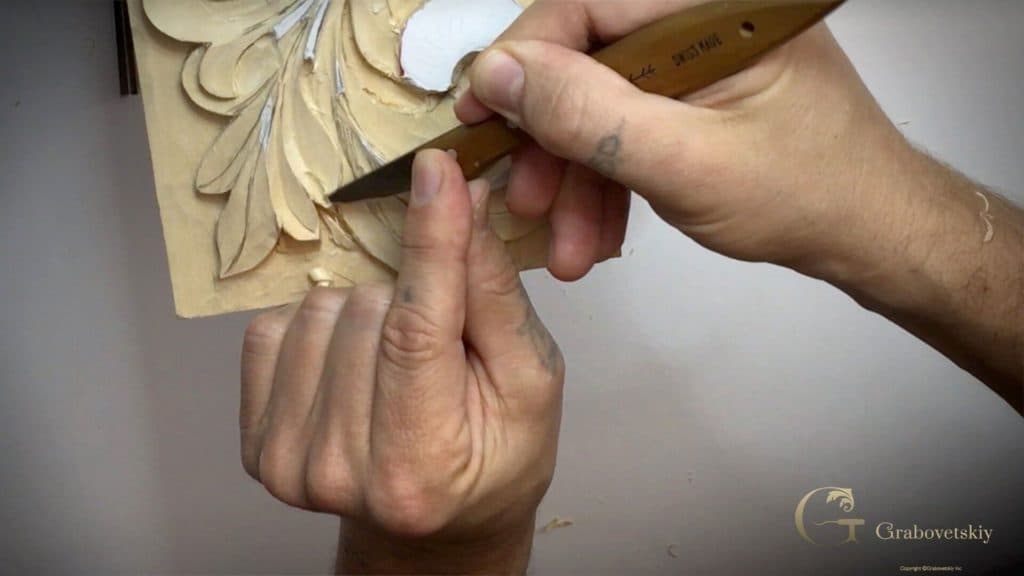
Number 12 is my favorite knife, and it doesn't have to be any one brand, any carving knife will do. The edge of the knife gets me to any details without changing too many tools.

You can see how easy it is with the knife. Any shape. With the V tool I would not get to the corners like this, but the knife reaches the tiny spots and removes that wood with ease.

In the second part I tell you why I keep coming back to the knife. At least for myself, I found you can do some of the details much quicker with a knife than even with some gouges.

On a livestream about knives in April 2020 I compared two number 12 knives. One blade was short and one was long. I broke that one and just reuse it, and I grab my shorter version a lot more often than the longer one.

A wall on the line, then clean beside it
This is the whole move. I set a straight down cut on the line, then clean the waste beside it, and exactly the same applies everywhere round the leaf. That way I can make my leaves and my details fine-tuned.

Part two takes me round the outside borders, the outside perimeter, to see how deep I can get with just a knife. As I say on camera, I can remove really sharpest points with the knife, just like that.

The outer border comes back easily this way. It's easy, especially because I know this border will be undercut later on, and there won't be any tool marks left.


Where does the knife slip?
At the end grain. Be careful there, because it's easy to slip your knife and damage the overall picture. Be really careful how you control your knife and where you're positioning your hand. That's also really important.

On that knife livestream I said it even stronger. Never place your hand at the front of your knife, because you can slip and cut yourself really, really badly.

Why I didn't turn the panel
It's always a good idea to carve with the grain, which on one spot in part one meant the opposite direction. I didn't want to rotate the panel. A knife lets me go even against the grain, if you do have a sharp knife.
Later, with the V tool, the grain changes again and I'm already going against it. Make sure your tool is really sharp there too.
On the knife livestream I showed how I do it. I'm not just pushing, because I'm carving against the grain, I'm slicing, like slicing a piece of bread.

How much background is still to come off?
Another 1/16 or 1/8 of an inch, about 1.5 to 3 mm, and it depends what you left for the background. Later on we're still going to remove the background even more. The border I refine today sits on a floor that isn't finished yet.
For scale, in lesson 2 I went about five-eighths of an inch (16 mm) down on a block about one inch and an eighth (29 mm) thick. I eyeballed it and drew the line with my finger against the wood.

The grounding tool I use, and why it's bent
For one small spot I needed a small tool, and I could use a small number nine or something different. I took the grounding tool, about an eighth of an inch (3 mm), by Ashley Iles. This is actually an excellent tool for carving like this, especially when there's a background like the one we have here.

I have different grounding tools, but I like this one because it has a slight bend in it. Just a slight bend. When a piece is in my way, a straight one would not reach as deep. Even with a straight one you can get really close, though.

In this lesson I mention Chris Pye's tool too. He calls it a two and a half grounding tool, and it doesn't have a bend. It's not a three and it's not a two, just somewhere in the middle.
Workshop 3 of the antique style rosette is where I held one of his next to an Ashley Iles one. His are excellent tools, but they're straight, so I use them less. The slight bend, in many cases, you must have, and it just works a lot easier.

They come in different sizes. There's a smaller one than mine and a bigger one. In my opinion it's really a must-have tool. Later in this course, in lesson 15, I take a big two and a half background tool, another Ashley Iles, to remove the ridges.

Back on the Corinthian leaf, in lesson 6, I called cleaning the background probably my most favorite part. You're also training your hand to make the surface really smooth and nice.
How deep does the grounding tool go?
Down to the main background, and that's all. Watch it. Believe me, it's easy to go deeper than the main background will be. Closing part three, I said it again, really important to keep an eye.

One pocket needed the knife again, down on those three sides, and then the grounding tool to clean it. I also rotate the panel to attack it from the far side. When I want to change a detail a little, one way is to take the knife, follow the line, recreate the picture, and then clean it with the grounding tool again.
The man who copied my carving
Let me tell you a story. One person watched online how I did some of my carvings, and he decided to repeat one. He did it, too, though not the way I would do it. Nothing wrong with it. He shaped the wood and then sanded all the details.
I kind of like leaving all the chisel marks. It's still carving, even if you're sanding, and there's nothing wrong with sanding if you want it smooth and nice.
He didn't know what wood I was using, so I wrote a comment and said it was lime wood, the same wood we're using right here, and in his video he also mentioned it's soft.
Is lime wood too soft to hold detail?
They call it soft wood, but it's not really soft. You'd be surprised how nicely lime keeps the detail if people don't damage it.
Of course you can damage any wood. You can damage oak, walnut and cherry, and you can definitely damage lime too. I don't know why you would do that. But I really love lime wood. I really do. Some people call it a queen of the woods.
Wikipedia lists lime and linden as the names for the European species of Tilia.
The V inside the Greek leaf
Part four starts on the details. If you remember, when we started this Greek acanthus leaf, it has a V cut inside of those leaves. Later on we'll do different acanthus leaves that won't be a V cut. In this case we have to be accurate to the history, and, as I say on camera, historically the Greek acanthus leaf has that V cut on the inside. So that's what we have to keep.

Wikipedia calls the acanthus one of the most common plant forms used for leaf ornament in the building tradition that came out of Greece and Rome.
Any V tool will work, a 60 degree or a 45 degree. I said I'd probably take just the 45. On camera, the V tool in my hands has 15/6 marked on its handle, a number 15 at 6 mm, about 1/4 inch.

Why my V cut is not in the center
The V groove is supposed to be right in the middle of the leaf, but that doesn't necessarily apply to every detail. You have to keep an eye on the central line, the central movement, and see how it's supposed to move. It isn't a straight line.
If a leaf goes downhill, I have to show that movement, and my V cut is not going to be in the center. On one leaf I moved it a little to the left and made the groove with a little curvature. On another you can see I left less space on the right-hand side of the middle line than on the left.

Dig in, then escape before the edge
Don't force the V tool. Make a V cut right on the line, then escape before you hit the edge. You dig in and escape with your tool, and you make it somewhat deep.
Then I repeat, moving a little with each pass. I'm changing the angle I carve at and moving the tool toward the right, and then I do exactly the same on the other side and kind of shave it.

One leaf was tiny, and its middle line has to be found without making any mistakes. It starts somewhere really, really far, and that's important to control. So at first, micro cuts.
I did a straight down cut, then moved the tool toward the right-hand side angle to set one side first, carefully. When the grain changed direction I rotated the panel and worked it from the other side, using my V tool as a chisel and keeping the middle line still untouched.
Does a Greek leaf need a ridge inside?
We left some higher ridge inside the leaves of the Corinthian acanthus leaf. A lot of times the Greek one has absolutely no ridge, just a pure V cut. But you could leave one, and it would still be authentic.
What you see depends how the light hits. On one side I saw a ridge left, and I don't want to see too many lines, so I took just a knife and refined that side until the ridge disappeared. Then I cleaned the middle line again, and between two leaves I said I might carry one groove a little further, using the V tool.

A step that isn't really necessary
I say it straight in part two. This step isn't really necessary, but I kind of like to see my semi-final outline, or border, before I do the next step. And it's taking shape as we carve.
The tools on this outline, side by side
Four edges did the work in this lesson, and each one has its own trap.
| Tool | Job | Watch |
|---|---|---|
| Number 12 knife, any brand | Knife goes in on the line, and the waste comes off beside it | Slips easily on end grain |
| 90 degree V tool | One part lies on the background, the other stands raised | Don't zip underneath yet |
| Grounding tool, 3 mm (1/8 in) | Clears the background beside the leaf, its slight bend reaching past a piece | Easy to sink below the main floor |
| V tool marked 15/6 | A V cut inside each leaf, off center when the leaf moves | Escape before you hit the edge |
What comes after this lesson
The background still drops a little more, and the border gets undercut later in the course. The next one is lesson 6. In lesson 9 I say this carving is a little deeper than the Corinthian, so you'll see some really nice effects when we deep undercut.
Every lesson of this Greek acanthus course is open with tuition, and if you're still choosing tools, the tools course is a good place to look first.
How it's done
- Redraw the major lines. Put the pencil back on the wood. Copy them from a new print of the drawing, or eyeball them as I do.
- Check the flow. Each line has to run into one flow line.
- Set the border. Take the knife straight down on your line and clean beside it. Mind the end grain and where your hand is.
- Clean the floor. Keep a small grounding tool level with the main background, and turn the panel when a spot needs it.
- Carve the V inside each leaf. Take any V tool, 45 or 60 degrees, dig in on the line and escape before the edge. Move the groove off center where the leaf goes downhill.
- Take off the ridge. Where the light shows a ridge you don't want, refine that side with a knife until it disappears.
Frequently asked questions
What size grounding tool do you use on a small panel?
On this Greek leaf I used an Ashley Iles tool, 3 mm (an eighth of an inch) wide. Smaller and bigger ones exist. Mine is slightly bent, which helps when a carved piece sits in the way and a straight one wouldn't reach as deep.
Can a V tool set the whole outline?
A V tool ground at exactly 90 degrees can, with one of its chisel parts lying on the background and the other raised up, taking the wall to the line little by little. I showed it as one way. My own preference is the knife, because the V tool would not get me into corners like these.
How much deeper does the background go after refining?
About 1.5 to 3 mm more, a sixteenth or an eighth, depending on what you left. Watch the grounding tool so it never goes below the main background. Later the border gets undercut, and by then no tool marks from this stage will be left.
What to carve next