

Alexander Grabovetskiy, woodcarver, School of Woodcarving · Published 2022
How do you carve a small flower in relief?
Quick answer: Carving a small relief flower is, on my floral panel, five petals, each carved with about four cuts. Two concaves on the sides leave a convex middle, and more concaves run toward the center of the flower. Then the lines get a wave. A straight one does not look natural.
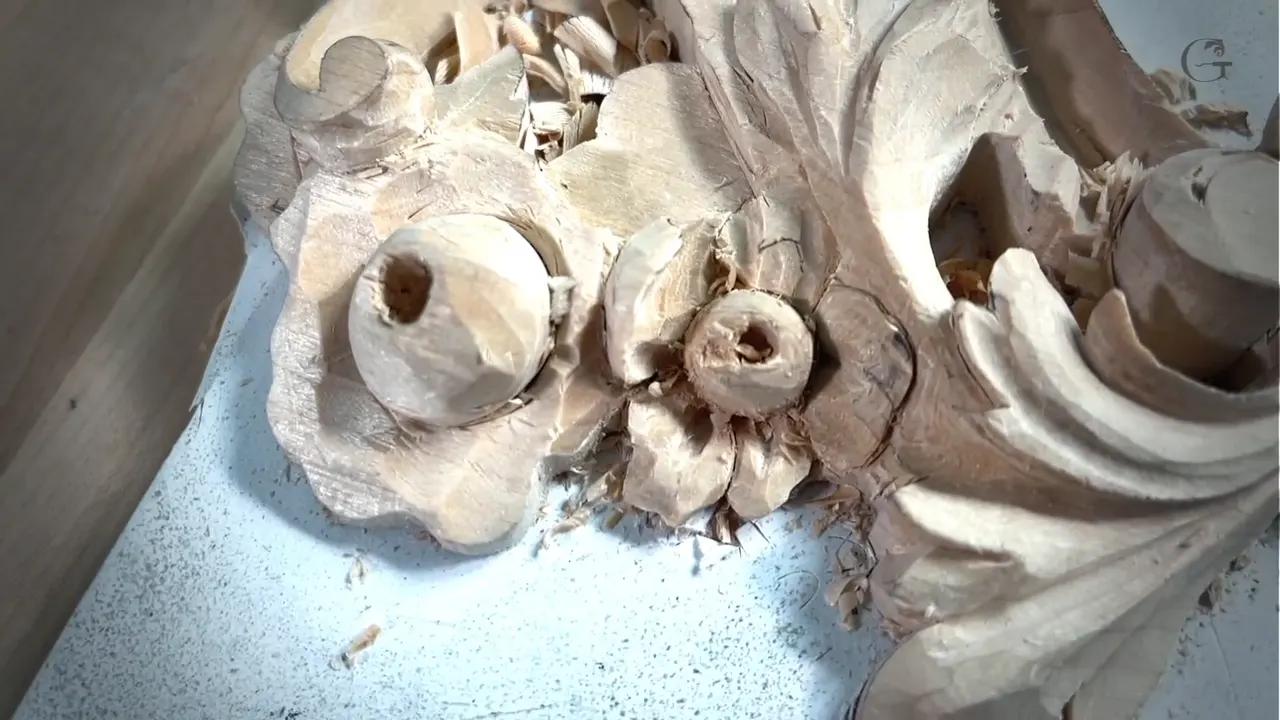
A small relief flower, on my floral panel, is five petals and about four cuts in each one. Each petal keeps a convex middle between concave sides, and the lines stay wavy.
This is lesson 7 of my course on a floral and molding panel, and two small flowers go into its relief. They kind of slope in opposite directions. I lost some of the footage, because the file I found was corrupted, so at the start I just explain what I had already done.
You want each petal to look lifelike, right? And you'd like to know what to do when the edge of one breaks? Then watch the order I worked in. You'll see the tools I named and the spot where I pressed too hard.

Six things these two flowers show
- The center holes went in first, as plug cuts, with the tool perpendicular to the slope.
- This flower gets five separations, and the fifth sits over the acanthus.
- One petal comes down to four cuts, concaves around a convex middle.
- Tiny tools tuck one petal under another.
- The wall at the acanthus is 1 mm, no more.
- The hole in the middle was a little too round, so I broke up the circle.
How do you carve a small flower in relief on a panel?
I began with the holes on this panel. Each one went in as a plug cut with a number nine gouge, and after that I worked my way around one flower using a number seven. Then came the curl, five separations, and the petals one at a time, with the acanthus right beside them.
These flowers are really small and tiny, as I said near the end.
Why does the hole go in at 90 degrees to the slope?
The tool follows the slope of each flower. On the first one the slope goes like that, and the tool goes perpendicular to that slope, and it was about a quarter inch deep, made by a number nine of a quarter inch (6 mm).
For the opposite flower the slope goes the other direction. Again, the tool I presented was perpendicular, 90 degrees to the slope, but I used a different tool there, a number nine of one-eighth of an inch (3 mm), and again a quarter-inch plug cut.

What does the curl need underneath it?
The cut underneath. I needed a curl, flipping on top, almost on top. I started around it with the number seven, though I said a smaller tool probably would be better, and for the cut underneath I took a number 11 of 3 millimeters, one-eighth of an inch.

I don't need that big curl on this side, I said, it's just a little too big. So a quarter-inch tool was safe for now.
Around that roundness went a flatter tool, maybe a number six of three-eighths of an inch, 10 millimeters. That is not what I wanted, I said a moment later. But I'm okay. From the side there was plenty of material left.
What happened when I pressed too hard?
A piece came off. Oops, I said, that is not what I want to see. That happens sometimes.

I still had some of the material left, and yes, I could glue that back and restore it. The reason I made that mistake was just pressing too hard. And yes, I was trying to rush it, because that is a real production piece, and I had multiple conversations that morning. Not that I had to do it much quicker. That was in my head.
I didn't glue it, because I didn't really need it, and I thought it was a good opportunity to show what you do if stuff like that happens. So I changed my tool to a number six, 3/8 (10 mm), but a little different one, with a really, really long bevel. I hoped it would dig inside much better. Obviously, that was my hope.
It's always a good idea not to rush, I said right after.
What does the middle of the flower become?
Half a sphere with a hole in it. This center part is about half an inch, I said, maybe not exactly, about maybe 12 millimeters or so. I can't probably go deeper than that, or I think it's going to be all the way through.
Next I needed to reestablish my hole in the middle. An eighth-inch number nine dug it inside. I could actually even drill it, I said. But that's okay.
When does a small gouge need the strop?
Right before the end grain, on this flower. It looks like I need to buff it slightly, I said, not buff it, but strop it. For those of you who don't know what I mean, it's a Mirror Paste by Trend, a really, really good product, and it helps a lot, actually.

In lesson 4, on the same panel, a number nine got mirror paste on a strip of leather.
After that I carefully excavated some of that material. Very much this area is end grain, because the grain of the wood runs that direction, and a tool must be super sharp there. It just absolutely must. It doesn't leave any trails, you can see, and that means the tool is really, really nice and sharp.
The next tool, a small number five spoon, needed to be sharpened, because I could already see the difference of the cut. My sharpening course is where I teach that part.
How many petals does this flower get?
Five. I counted them on camera, one, two, three, four, and there's going to be a small one. Here the number five is going to go right on top of the acanthus movement, and the separation is a little different from what I did on the previous one.
What are the four cuts that shape one petal?
Concaves around a convex. In every petal I try to get the main idea of the flower. The middle part is convex, the side concave and concave, and that way it gives me some 3D.
There is also a bulging this way, convex and concave, going closer to the center part, and another concave. That makes four cuts, if you look straight at that petal from that direction.

I grabbed a quarter-inch number nine next. Number one concave. Number two concave. You could see I already had a convex in the middle, then another concave this way, and one more, but not like a normal way. Pretty much four cuts, one, two, three, four, and now I can just work my details with much smaller tools if I want to.
| Moment on the flower | The tool I named on camera, with its size | What I said it was for |
|---|---|---|
| Hole in one flower | number nine, 6 mm (1/4 in), perpendicular to the slope | a plug cut, about a quarter inch deep |
| Under the curl | 3 mm (1/8 in) number 11 | the cut underneath a curl that flips almost on top |
| Roundness around it | a flatter number six, 10 mm (3/8 in) | working around that roundness |
| A petal tucked under | a 1 mm number 11, then half a millimeter (about 0.02 in) | digging underneath, then much deeper for shadow |
| Center, divided in five | number three, 3 mm (1/8 in), after I put on the magnifiers | working my way in, wavy and not straight |
Outside the petal I wanted the same idea, concave, convex, concave. Not big, but still. I used just a number five, and that's going to look lifelike.
What is the flute of a gouge, and where does it point?
The flute is that groove right in the middle of the gouge, or in my case a veiner, a number 11. To tuck one petal right underneath the curly one, I took a one millimeter number 11, placed that flute away from the line, and started digging right underneath.
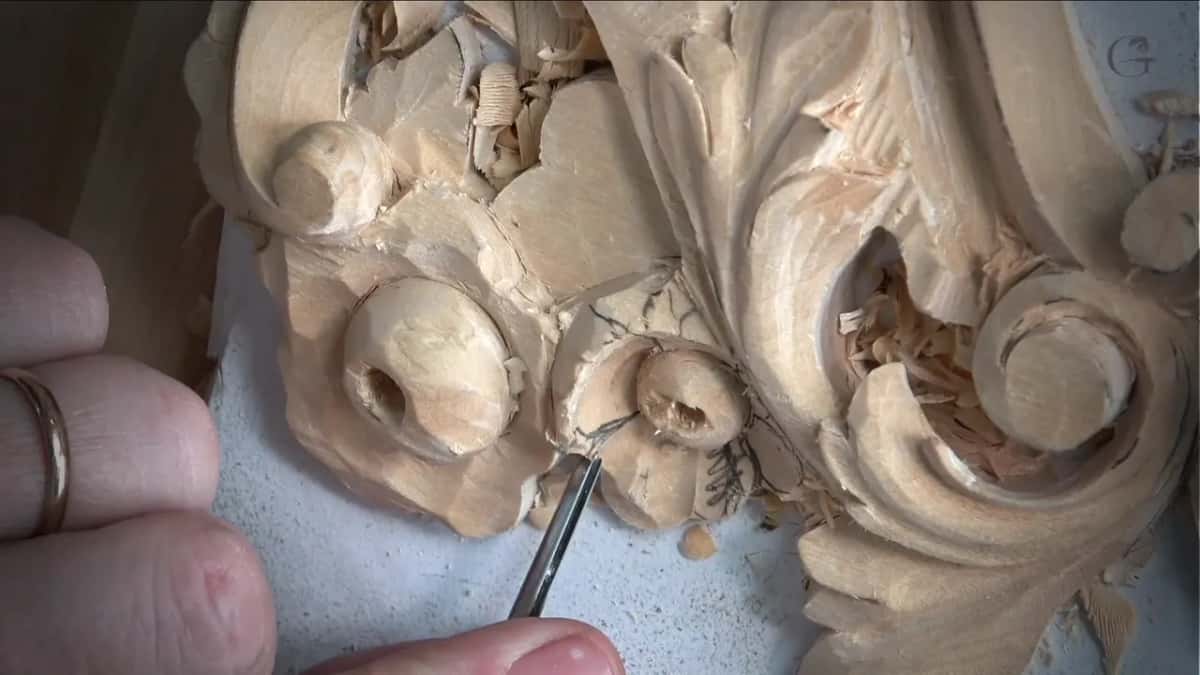
Little by little. I took my time. A smaller tool came next, half a millimeter, and I did exactly the same, but much deeper. It's going to create really beautiful shadow.
Why does every separation on this flower get a wave?
A straight one does not look appealing to me. After that deeper pass the line was just too straight, so I got a smaller number five, about an eighth of an inch (3 mm), made a cut toward the center, then took another number five and flipped it the opposite direction.

You should be able to detect that wave. You can play around with those movements and get them a little more exaggerated. That would be up to you, up to your creativity. But don't leave that line straight, because it's not going to look natural.
A few minutes later a separation looked like a straight line again. Just try to avoid straight lines in flowers, I said, and create some kind of wave, some kind of arc or whatever, the arabesque, if you know what I mean.
Why leave wood between the two flowers?
A petal from one can go under the other. I don't want to remove the space between, I said, because with the next flower to the left I can bring that petal right underneath and create an intersection, pretty much two flowers together.

Inside one flower it works the same way. This petal goes underneath, and the next one goes on top. I'm kind of having fun with that type of work. I do.
How small do the tools get on a flower this size?
Smaller than the mark on them, in one case. To curl one petal backward, after an eighth-inch number nine, I went even smaller with tiny tools by Dockyard. This one is one millimeter. It says 1.5, but it's not 1.5. It's much smaller.

For the next petal I used just a knife for now, a really small, tiny knife. Later came the flatter back bent, to remove a few ridges. In the Gibbons class 11 I used a back bent upside down inside a big tulip, because I didn't want to lose that roundness.
Later my straight tool was not sufficient anymore, so I switched to a really, really good spoon, a really short one, an eighth of an inch, number eight.

To see what I'm doing on those petals I also needed my glasses, like a magnifier. At the start of the last part it was not really comfortable, since I had to get really close with my face, and my head would end up in my camera.

Those magnifiers are not really expensive, and you can buy them on Amazon. I just put them over my glasses. Not a big deal at all.
How thin is the wall where a petal meets the acanthus?
About 1 millimeter, no more, about 0.04 in. That leaf goes right on top of the acanthus leaf, so I needed a cut right around it, with some waviness where it touches.
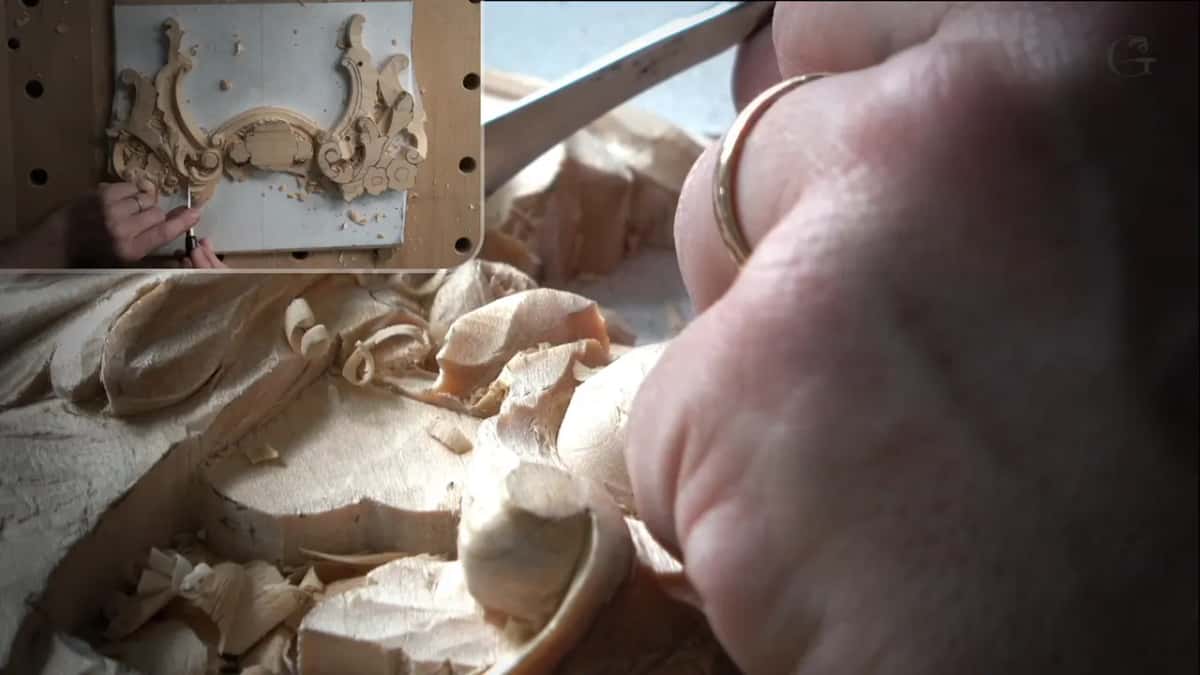
If you ask me how much wall I'm leaving, it's about maybe just no more than 1 millimeter. I could go for a deep shadow right there, but I think it could create a problem with the acanthus movement. So for the shadow I made a concave right on that side, going with the direction of the overall movement.
Then I hooked up my phone and flew it around the work. It's actually one millimeter, no more, I said, and it's not really a wall, because I still kind of undercut it.
Why break up the circle in the middle?
That hole was just a little too round, I said, and it shouldn't be that round. First the middle part got divided in five, and they don't have to be exactly the same. I'm talking about how wide those separations are. The main idea is not to make a straight line.

There is nothing special about that part. Just work your way in and make it wavy. Use your creativity, but don't overwhelm.
The hole itself needed different number eights and number nines, and I kept a few of my Dockyard tools closer to me. Dockyard is, of course, just a brand. But those tools, I really, really like them.

You don't want to see that opening too round, I said. That doesn't look natural. Create some concaves and convexes all around, and they don't have to be the same everywhere.
How long can you work on one small flower?
All day long. You can spend all day long just working on that middle section, I said, and it's all about how much detail you want to put to it. Sometimes, working on a bigger one, you can create awesome ones.
Here I stopped once most of my movements were in, since I didn't need to film my cleaning process.
Where does this lesson sit in the course?
This is lesson 7 of Carving Floral and Molding for the Panel, with lessons 5 and 6 right before it and lesson 8 right after. In lesson 1 I said I still use the same basswood, limewood, linden wood. It's the same thing, lipa. Wikipedia files that tree under Tilia.
Lesson 2 gets the background flat, and lesson 13 has flowers again. The panel is part of a bigger Venice room project, a real-life project, and the Venice Room course holds a lot more of that wood carving.
With Access you get the full videos of all fourteen lessons on this panel. You'd like your petals to curl and tuck under, right? Then start where I did, at the hole.
How it's done
- Plug cut the center hole. Hold a number nine at a right angle to that flower's slope and take a plug cut about 6 mm (1/4 in) deep.
- Separate five petals. Make five separations. On my panel the fifth petal went over the acanthus.
- Carve the four cuts. Take a quarter-inch number nine and carve a concave on each side, keep the convex in the middle, and add the concaves running closer to the center part. Then work the details with much smaller tools if you want to.
- Tuck a petal under. Set a 1 mm number 11 with the flute away from the line, dig right underneath, then go much deeper with a half millimeter tool.
- Make the lines wavy. Where a line reads too straight, go back with a number five, flip the tool, and put a wave in it.
- Break up the round hole. Put some waviness into the opening with a few small number eights and nines, and small concaves and convexes all around it.
Frequently asked questions
Do you glue a broken petal back on?
Not on this flower. When a piece came off, I said I could glue that back and restore it, but I didn't really need it. Plenty of material was left, so I took a number six with a really long bevel and kept working with what I had.
What tells you a gouge is sharp enough in end grain?
Whether it leaves trails. On this flower the area was very much end grain, and I said a tool must be super sharp there. Mine didn't leave any trails, which meant it was really nice and sharp. A small spoon a minute later needed sharpening, and I could see it in the cut.
Which tool slips one petal under another at this size?
A number 11 of one millimeter, placed with the flute pointing away, going right underneath little by little. After it, a half millimeter tool went along the same way, much deeper, and that gave a really beautiful shadow under the curly petal.
What to carve next