

Alexander Grabovetskiy, woodcarver, School of Woodcarving · Published 2024
How do you work out which petal should lie on top?
Quick answer: Which petal lies on top is, on this walnut panel, a choice made from the light. The panel will stand upright, so light will most likely come from above. One way, the spot where two petals meet washes out with no shadow, so the other petal sits lower, and on the far side the overlap turns around.
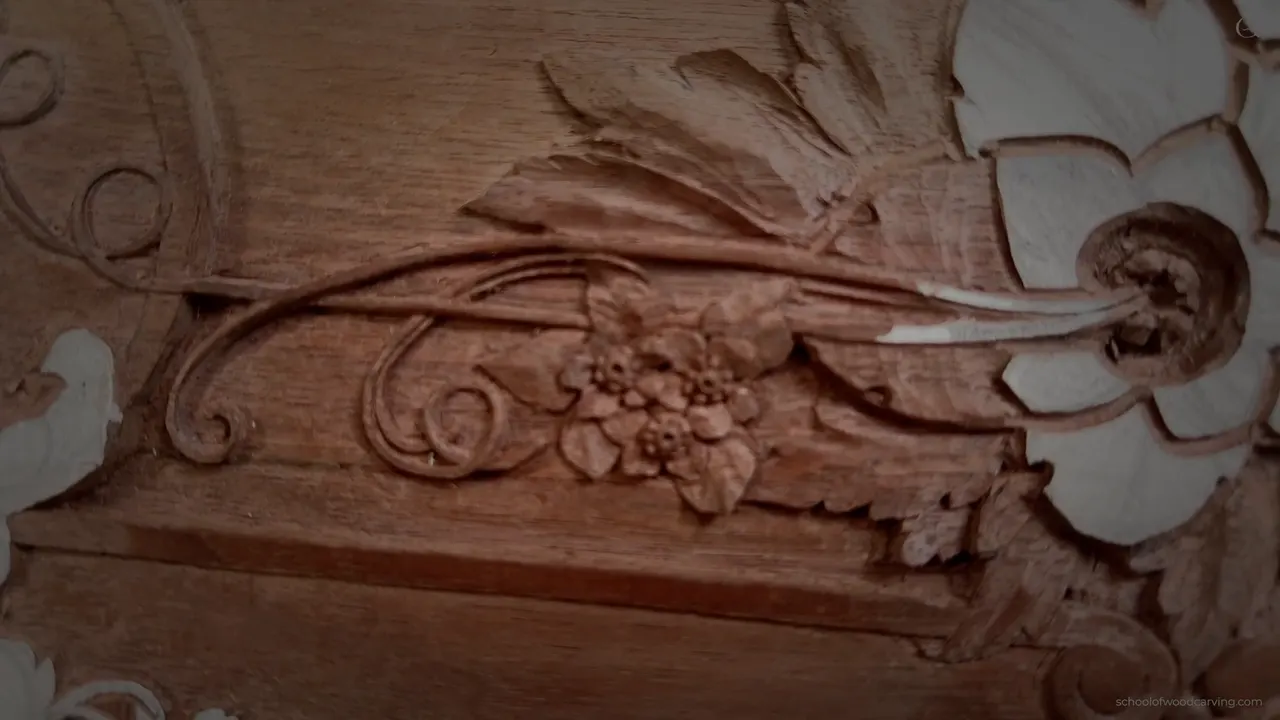
Which petal lies on top, on my walnut furniture panel, is a question of light. This panel will stand upright, and the light will most likely shoot from above. Lay one petal over its neighbor the wrong way and the light washes that spot out with no shadow, so the other one goes lower instead.
You have seen a lamp hang over a dining table? And you have seen the dark line under the edge of a shelf, where the light can't get in? Light coming down from above, like that, picked the top petal on this flower for me.
Lesson 33 is one acanthus flower in three videos. Below is how I settled the overlaps, how I lowered the part that goes under, and the rest of the work on this flower.
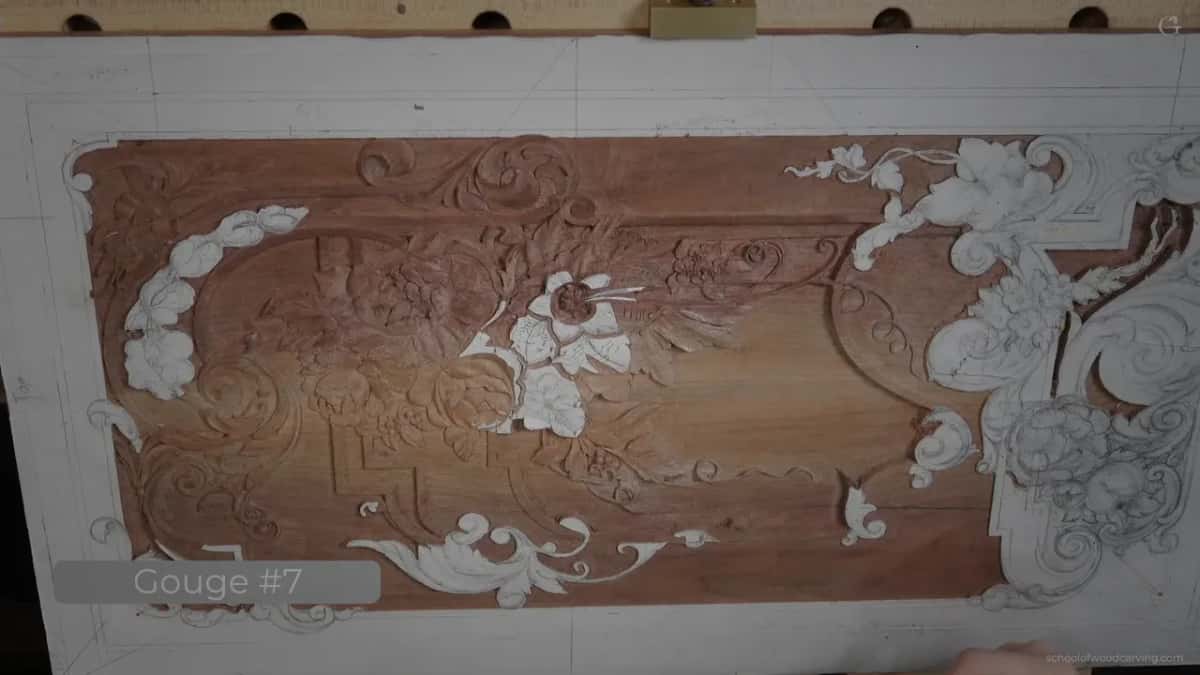
Six things I did on this acanthus flower
- Asked where the light will be, and since the panel stands up, it most likely comes from above.
- Decided to lower one part slightly, so the petal over it casts a shadow instead of washing out.
- Turned the overlap around on the far side, for the same light.
- Gave every petal two hollows and a raised middle, with one more soft hollow inside that middle.
- Kept each petal edge going uphill, even where it overlaps.
- Made the divisions with a number 11 veiner, not a V tool.
Where will the light come from on this panel?
Most likely from above. This is the top of the panel, and it is going to stand like this, so the light will come down from above and travel that way.
At one spot I really wanted to see an overlapping motion, one petal over another one. So I had to make the decision about what goes where, and I explained it logically, from the light source.

I said the same thing on the Venice Room, in workshop 64. The basic stuff, I told you there, is to understand the light source before you start drawing. What kind of shadow will it cast, how does the light travel, and how many light sources do I have? From above, from the window, from the side, from the door opening. Interior light, or light at night. I have to consider all of those lights.
Painters have a word for strong light set against dark in a picture, chiaroscuro. My way of saying it on this flower was shorter. Exaggerate the shadow with the light.
What goes wrong when the wrong petal is on top?
You lose the shadow where they meet. If I overlap this petal over that one, I'm not going to get any shadow. It will be washed out with the light.
So, most logically, I needed to lower that part slightly to create the shadow. I have to do it in this case, I said.

Then I looked at the other side of the flower, and it was exactly the same idea. This part goes above and that part goes below, again because the light travels this way, and I want that shadow there too. Yes, I know we're changing the direction. But that's logical.
Four lessons back, on lesson 29, I followed another logic, the way a flower unfolds from the bud, and that page tells you why. In the Grinling Gibbons class in Maine, class 8, the overlaps went one direction for the same reason. On the Tray of Blessing, lesson 3, the light did not make the choice so clear, and I went by which lobe looked dull. Different pieces, different reasons. Here the light had the last word.
How do you lower the part that sits underneath?
With a flat number 3 gouge. Early in the second video one part had to go right underneath a detail. That detail had to be on top, so I lowered the part below it with the number 3.

It has to go down organically. The middle can stay slightly raised, but not too much, so it keeps a somewhat convex feel without a huge convex.
Next to the inner petals I kept the same depth I had right beside it, about 3 mm (1/8 in), probably 4 mm at the most. Then I lowered even more right around that detail, because I wanted it to feel like it really goes underneath. I left about 1/16 in (1.6 mm) above the background, and that is my low spot.
After that it looked loud to me. I feel like it's really screaming, I said, so I took the number 3 again, used the tool upside down and blended it.

In the third video, at one spot I hadn't decided yet. Maybe this part overlaps, maybe I make some kind of separation, but still, I really want a shadow in that section. Later, on the inner part, I made my preliminary separation cuts first and lowered right away, because I want to see the overlap. Near the end I said it plainly, that it always looks better if it does something, just overlapping.
Does the top petal still keep a raised edge?
Both sides of it stay raised. I said it more than once, and maybe it's redundant, but the edge has to be raised on both sides. Even where it's an overlapping motion, it still has to go uphill.

Then the undercut took that away from me. Because I undercut right underneath one petal, I lost my concave going uphill, and I had to reestablish it. The idea is to get that ridge higher again. That makes a nice shadow, and the concave beside it makes the shadow even stronger.
Undercutting on this panel has its own lesson, lesson 19.
What shape does each petal have in section?
Two hollows, with the raised center of the petal between them, and inside that raised center one more soft hollow. Picture the petal sliced through and seen from the side, which is how I drew it for you on my iPad, exaggerated. Lesson 27 has the same idea on the acanthus leaf.
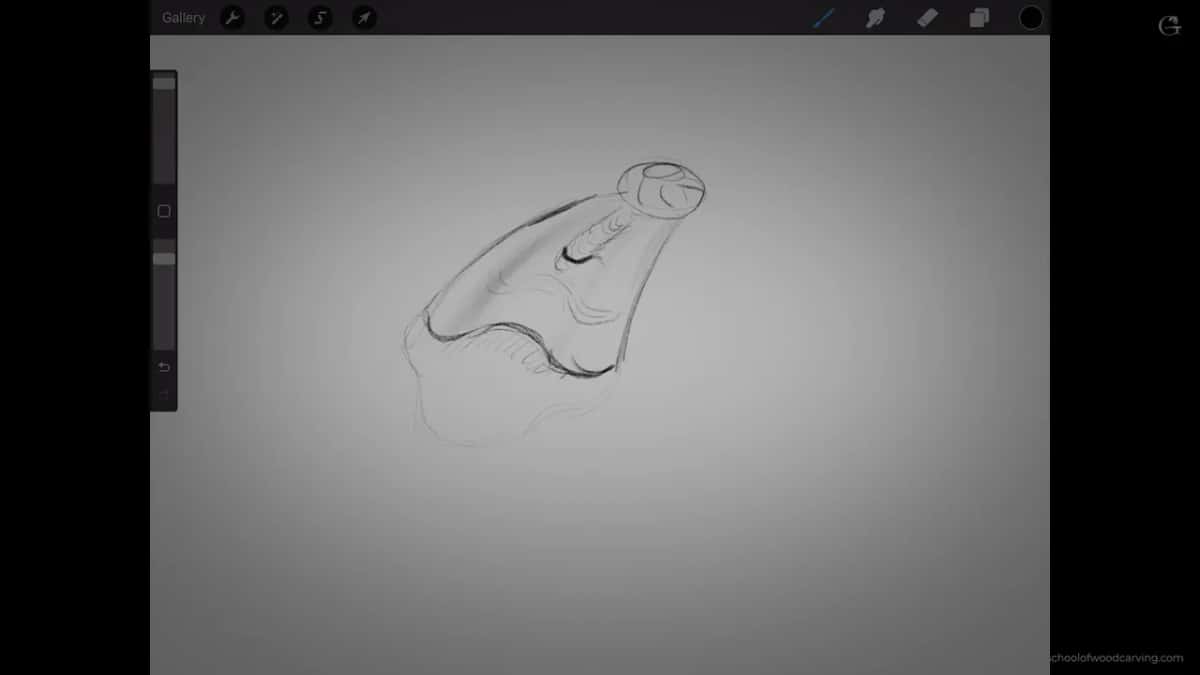
The edge goes uphill, and the center goes uphill too. Near the middle of the flower, another concave sits right inside the convex. Then we smooth those ridges, because we don't want to see sharp ridges.
You don't really have to follow that. But I highly encourage you to, because it's more authentic to the 18th century, and when I say 18th century, not everyone did that.
My first tool was an antique fishtail gouge, not really a number 7 and not really a number 8, almost seven and a half. There's no marking on it. Any number 7 or number 8 will work, a number 9 will work, so don't overcomplicate.
I don't keep the ridge high when I start. I start carving right below the ridge line, on both sides, and go deeper closer to the inner part of the flower.

Here is one of the mistakes I see some other people make. They start from the ridge, keep it really high everywhere, spoon it in and escape out. No bueno. It should not look like a spoon.
If you wonder how deep I went, closer to the center it was maybe 3 mm, one eighth of an inch, and some parts maybe 4 mm, a little deeper than one eighth. See how much shadow I got? I had plenty of depth there, so I was safe going in on those flowers.
For the soft hollow in the middle I took a number 8, between a number 8 and a number 9, because it looks almost like a half circle, and a number 9 is the true half circle. It can stay shallow, since I don't want to lose the convex. I started it from almost nothing and blended it so it would not scream.

| Part of the flower | What I did there on camera | Tool |
|---|---|---|
| The petal hollows | Started below the ridge, 3 mm (1/8 in), 4 mm the most | Antique fishtail, near a number 7 1/2 |
| Soft center hollow | Begun from almost nothing, then blended, and kept shallow | A number 8, nearly half round |
| Part under the detail | Lowered to about 1/16 in (1.6 mm) above the background, then blended | Flat number 3, also upside down |
| Line where petals meet | One side lowered slightly so a shadow forms between them | Veiner number 11, or a V tool |
| Divisions on each petal | Soft, only an indication, and on the inner part a single one | Number 11 again |
| Ridges and facets | Blended in, with the tool turned upside down and moved in circles | Number 3, 1/4 in (6 mm) |
Which tool marks the line where petals meet?
Several tools will do it. I'm absolutely okay if you use a V tool, any V tool will work, though I would prefer probably a number 11.
I like a number 16, the one with about 35 degrees. Or you could use a number 11 the normal way. That's what they used in the 18th century, as I said on camera, and a number 11 gives about the same result. Even better, I think.

I would not use a V tool for the divisions on the petals. They are not like the divisions you see on leaves, only an indication, and they stay soft, so it's a number 11 line and not a V. The inner part has a simpler shape, a single division, and soft. Not a triangle.

Can you clean the facets without sandpaper?
You can, though I don't really worry about cleaning them. Once you apply some finish, it makes them a little smoother, and I look at the facets like a painter's brush strokes. People ask me anyway, so here are three ways if they bug you.
First, the number 3 upside down, the same quarter inch (6 mm) tool. In a circular motion it rides on top of the facets and makes them pretty clean. I did it slowly for the camera, but in real life it goes much faster.

Second, scrape with the same tool. It gives a really beautiful result, and that's what they did, a lot of scraping in the 18th century. Third, burnish it with a small block of wood.
I would not use sandpaper. Earlier on this panel, in lesson 20, I showed reed rush, the Dutch reed, used like sandpaper.
A back bevel makes that upside down work much easier. There are multiple reasons for a back bevel, and using the tool upside down is one of them. You may catch the reflection of that micro bevel on camera. Bevels are sharpening work, and Carving Tool Sharpening has a course of its own.

Watch the grain on this flower. Some parts run along it, and I could catch them easily, so I slice and don't push. If I catch that part, I'll break it. I slipped a little bit anyway. It's okay. But try not to do what I did there.
My workbench rotates in every direction, so I can attack from the other side. For one spot it was easier to just flip it, and later I rotated the panel to do the same idea on the other side.

Where does the 62/38 split show on this flower?
Inside, on the inner part. The movement there is a little different, in opposition, this part against that part. If you're familiar with the golden ratio, take those two petals. They fill about 62 percent of the space, and the rest takes 38 percent. Or say 60/40, which is easier.
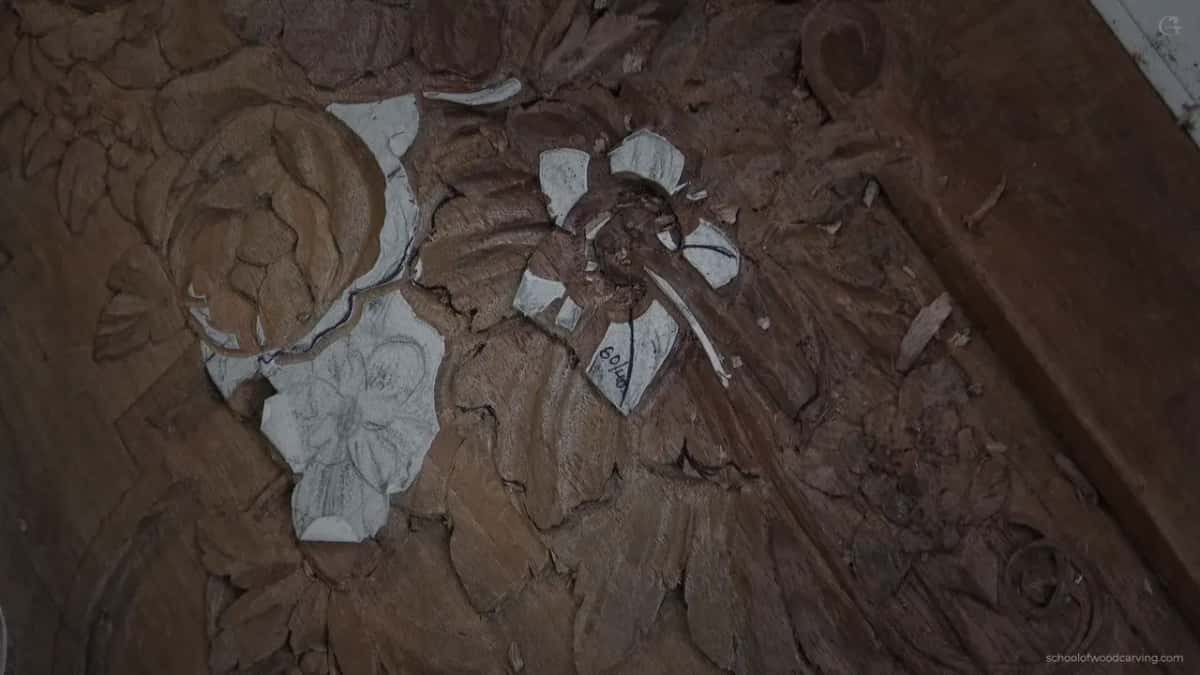
And they go in opposite directions, fighting each other. Do you have to be that crazy? No, you don't.
A little later I went in with a flatter number 3 to blend right underneath and shape the convex. I want that movement to be readable.

Does it have to be the 18th century shape?
Up to you, of course. But I'm trying to be authentic to the original 18th century work. And I really love the 18th century. The best furniture was produced in the 18th century, in my opinion.
This panel is highly, highly decorated. Some of its movements look more French to me, almost a French style, and that is probably what I want to stick to. And the 18th century wasn't alone in this, I said. The 16th and the 17th century did the same thing.
Before this flower I flew the camera around the section I finished off camera. I think it looks authentic, late 18th century. It's shallow relief on a walnut board only 10 mm (3/8 in) thick, standing vertical like a panel for a door, and its whole design was drawn in the design course.
Your flower will hang or stand somewhere, under some light? And you want a dark line where two petals meet? Then take down the part that should go under, the way I did here.
All three videos of lesson 33 are in Carving Furniture Panel, Part 3, right after lesson 32 and before lesson 34. In lesson 35 the light comes back again, at another overlap. If you want to carve this panel with me, the Tuition page has the Access plans.
How it's done
- Find which end is the top. Know which end is up and how it is going to stand. Mine stands upright like a door panel.
- Ask which way the light comes. Here the light most likely shoots from above and travels across the carving.
- Lower the part that should go under. If laying it one way gives no shadow, take the other part down slightly, so the shadow forms where they meet.
- Turn the overlap around on the far side. Same light on the other side of the flower, where the part above and the part below swap places.
- Mark the meeting line. A veiner, number 11, or a V tool if you prefer one.
- Raise the ridge again. After an undercut, if the concave going uphill got lost, bring the ridge back up so the edge rises on both sides.
Frequently asked questions
Is light always what decides a carved overlap?
Only on some pieces. On this walnut panel it did, because the panel stands upright and light most likely comes from above. On lesson 29 I followed the way a flower unfolds instead, and on the Tray of Blessing the light was not so clear, so I chose by which lobe looked dull.
What is the spooning mistake on a carved petal?
Starting the hollow right on the ridge, keeping that ridge high all along, then spooning in and escaping out. I call it no bueno. My petal hollow starts just under the ridge line on both sides and goes deeper toward the center.
How deep are the petal hollows on this panel?
About 3 mm, an eighth of an inch, and some parts maybe 4 mm, a little deeper. Deeper toward the center of the flower, and all of it on a walnut board only 10 mm (3/8 in) thick.
What to carve next