

Alexander Grabovetskiy, woodcarver, School of Woodcarving · Published 2024
How do you make a carved volute look slanted?
Quick answer: A slanted look on a shallow volute is something I get from the wall, not from the top. I skipped the square 90 degree pass on my walnut furniture panel and leaned the chisel to near 45, so a little extra wall stays standing. Seen sideways, that wall reads as a slant.
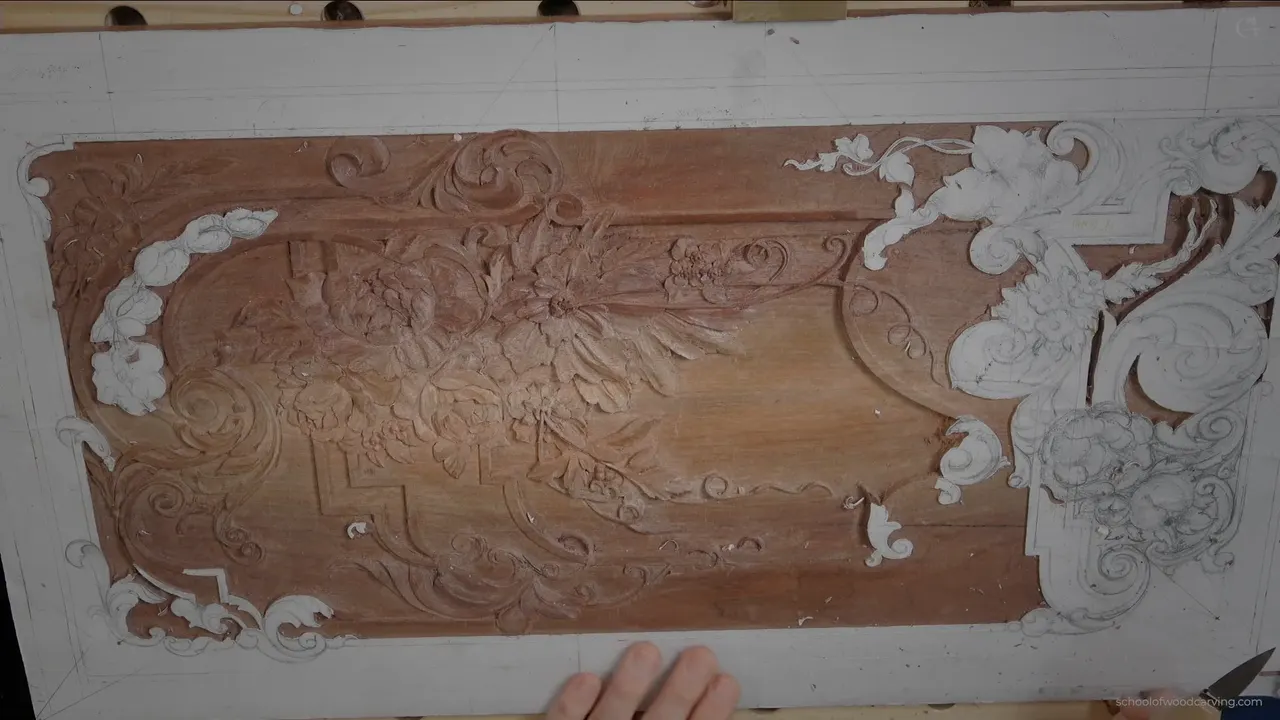
Making a carved volute look slanted is, on my walnut furniture panel, a job for the wall and not the top. I did not carve straight down at 90 degrees. I moved the tool to about 45 degrees and carved on an angle, so an extra wall stays there, and that wall gives the illusion that this part is slanted.
This panel is the same walnut board from design lesson 1, only 10 mm (3/8 in) thick, so not a deep panel. My work stayed on the same area as last time, on two small volutes and a leaf near them. Here is how they got their slant.
The slanted volute on this panel, in six lines
- Roughly 2 mm of room was left for the slant, and the rest of that part became a concave.
- Seen from above, the slant hardly shows.
- One outline, no more than 1 mm deep, took the stress off the fibers.
- A single corner of my gouge sliced, and nothing got pushed straight in.
- A half-millimeter veiner made the part feel like it goes right underneath, while the background stayed the deepest spot.
- Several times, a knife came out as a scraper for paper and ridges.

Why not carve the volute wall straight down?
You can, and it is the easiest way. Put the knife, or whatever gouge you are using, straight down, then take another gouge like a number seven and carve everything around it. Another easy way is a knife with two passes, one around that area and one from the opposite side. But I wanted to show you a different technique.
So my tool went in on an angle instead, which leaves that extra wall. I know it's kind of hard to understand from a video. Once we start carving, I said, you will understand.
Before I began, I pointed back to an earlier lesson and to a spot on the panel that already has some kind of slant. I did the same thing here.
How much room does a slant need?
About 2 mm on this volute, a little over 1/16 in, and I had left that extra space next to its main part before I started. A pencil line went down for the slanted area. My first line was wider. I could do a little less than that, I said, maybe just about two millimeters or so.

The rest of that part is a concave, and that is where the acanthus wraps around.
What is the shallow first outline for?
Fewer stressed fibers. The same number 11 I used before is two and a half millimeters, so I switched to a 2 mm one. One side got outlined right on the slant line, with an intersection point where the two lines meet. It is not the final intersection point.

My outline is not that deep. One millimeter, about 1/32 in, is the most, but it gives me an idea of how the part is supposed to be slanted.
Then a flat chisel. A knife will do too, I said, but I picked a tiny chisel, just a number one, from the Peter Benson collection by Ashley Iles. With it I made my wall and went downhill.
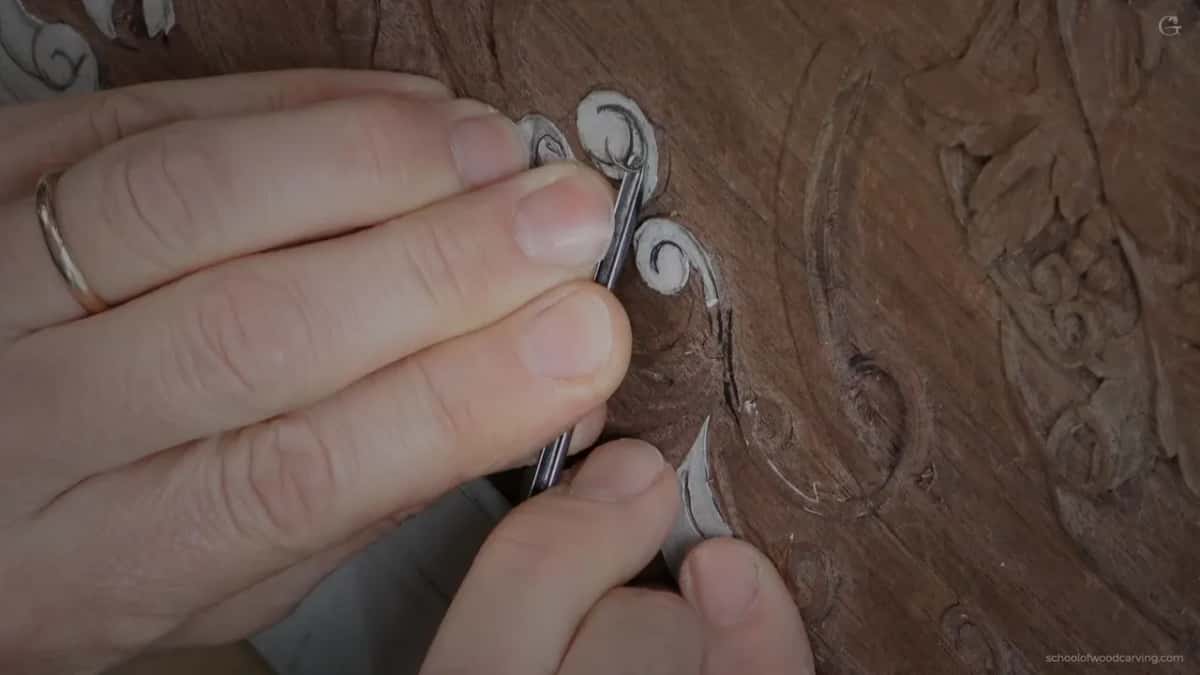
If you ask me why I made that first outline when I lose it anyway, it's the logic of fibers. I don't have to create a lot of stress in the fibers. Since a bit of wood is already gone, nothing gets smooshed down, and the waste is just flying out freely. Only the right-hand point of the chisel did the work, because it gives me a lot less resistance. I'm not going to force it.

Which way should the gouge walk?
Toward the line that is already there, walking along slowly. I grabbed a smaller gouge. A number seven or a number five will work and give pretty much the same result, and mine was a small number five, also Peter Benson. I started on the left-hand side, and you could start on the right.

Again, I'm not pushing it. Walking along slowly toward my previous line gives a much better and cleaner result. Then I showed it closer, and that is what I'm after.
On the other side the same number 11, 2 mm, did the outline, and there I had to be careful. The depth on that side is less than a millimeter, about half a millimeter or so, and I have to be consistent with it. That part also got attacked from another side, because it's going to wrap downhill and go right underneath.
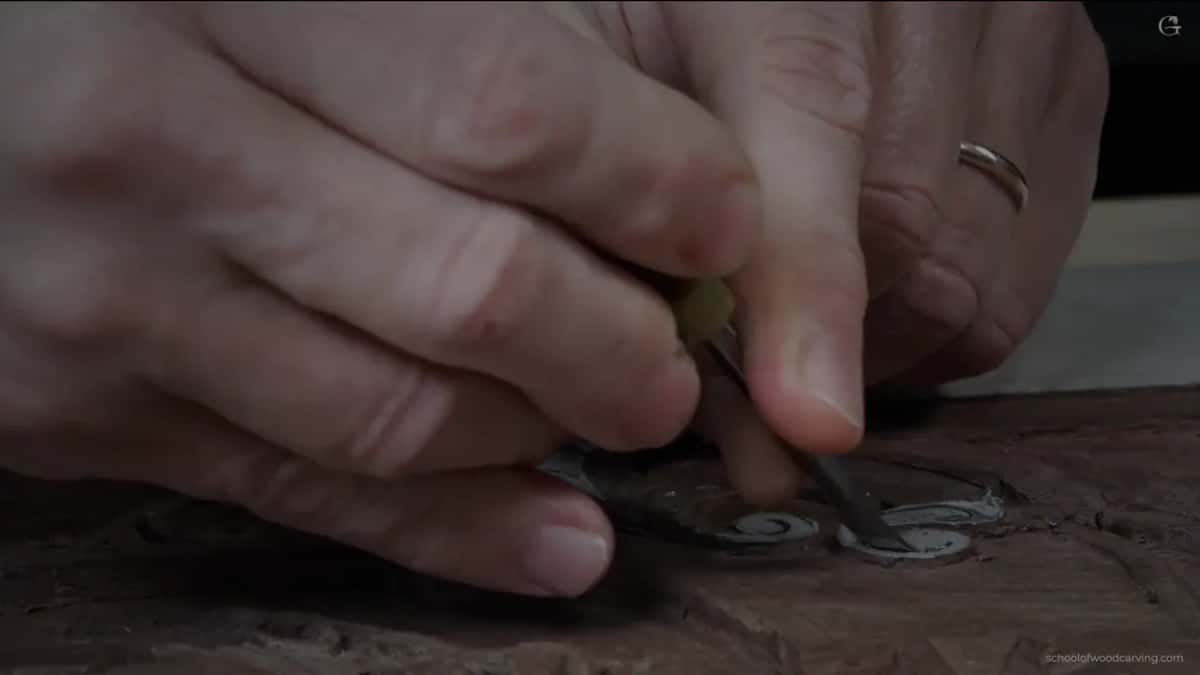
With the number five at 6 mm I sliced slowly. Try from two sides, I said. It all depends on the grain. In my case I could attack it from both sides with absolutely no problem, but sometimes only one side is good.
Why slice instead of pushing straight in?
A slice gives a lot less resistance and a much cleaner result. I said it to the camera more than once in this lesson. I am not pushing. I am slicing.

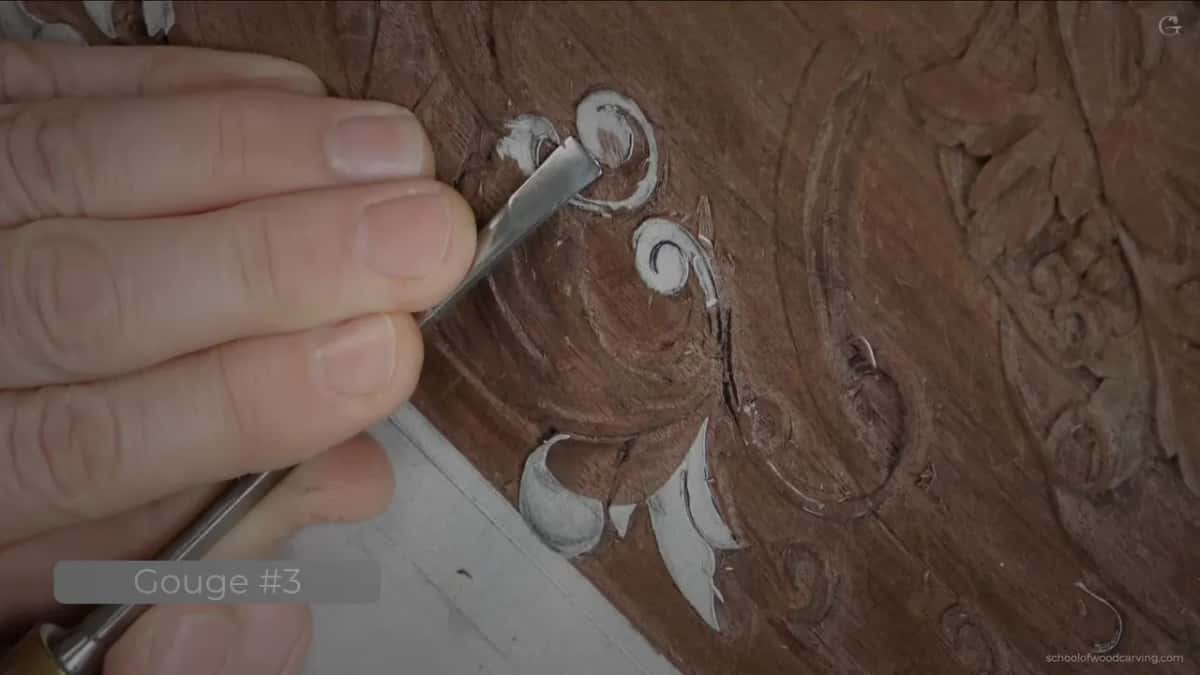
I changed the camera so you could understand better and showed it in slow motion, a number three at 6 mm (1/4 in) taking the wall all the way down.
If you ask me why not to push straight, I really like the way one man put it. He is a really good person, and he has taken my class multiple times. Pushing your tool just straight into the fibers, he said, is like climbing a mountain all the way straight up. A slicing cut gets you to the same top of the mountain, but you make the passes. That's much easier.
I took the slicing cut apart on its own in Floral and Molding lesson 1, on a floral panel. Here, after the slow motion, I said I really like the result, because now it feels like this part goes right underneath.
How can you check a slant you can't see from above?
Look from the side. When you look from above, you don't really detect it. Seen sideways, it's going toward the background slightly, not much, but it still does.
Before that check I sliced the next part to the right with that number three. A flat part was not what I wanted. Only the right-hand side of the tool went in, little by little, and there was absolutely no reason to push. I was recreating the same wall I made on the volute itself, exactly the same slant, but with a gouge this time, not a chisel.

I had to be careful there, because I was going against the grain. If the tool is sharp, you should be okay. It's still not the best idea, and it won't give you really good results. But sometimes, on a really complex design, there is no other way.
For the last bit, just before that check, I used a knife, with my thumb as a pushing tool, carefully, carefully. Then the same knife scraped slightly, and I got my slant. I'm not sure if there's even a word like that, I said.

On my plate with butterflies, in lesson 10, I didn't want one spot to look flat. I don't want to see that flat, I said, so I did slanting a little bit, not much. My reason was how it's going to affect the shadow. I care how it looks.
And in the next lesson, number 38, my stabbing cut on another part was slightly angled. I wanted to see a wall there, an angled wall, so it did not go in vertical. Near a slope the angle got much lower, about 45 degrees. You don't really have to measure it.

Every tool that touched these two volutes and the leaf
| Job on the volute | What I did there and what I watched for | Tool and size |
|---|---|---|
| First outline, kept shallow | Along the slant line, never deeper than one millimeter | Veiner number 11, 2 mm |
| The leaning wall | Carved on an angle first, then taken downhill | Tiny chisel, number one |
| Toward the intersection | Walked from the left, slowly, toward that line | Small Peter Benson five |
| Wall to the ground | Sliced with the right side, never pushed straight in | Gouge number 3, 6 mm |
| Going underneath | Straight down, flute at twelve, never below the background | Half millimeter number 11 |
| Eye of the leaf | A concave on each side so the middle stays raised | Number 8, about 4 mm |
| Line at the molding | Knife line first, then a little acanthus lifted away | Just a knife |
What does the half millimeter veiner do here?
It tucks the part underneath. To make it feel like it goes right under, I needed a number 11 at 0.5 mm, about 1/64 in. In my opinion that is a must-have tool, especially if you are a furniture maker. You get so much with it.
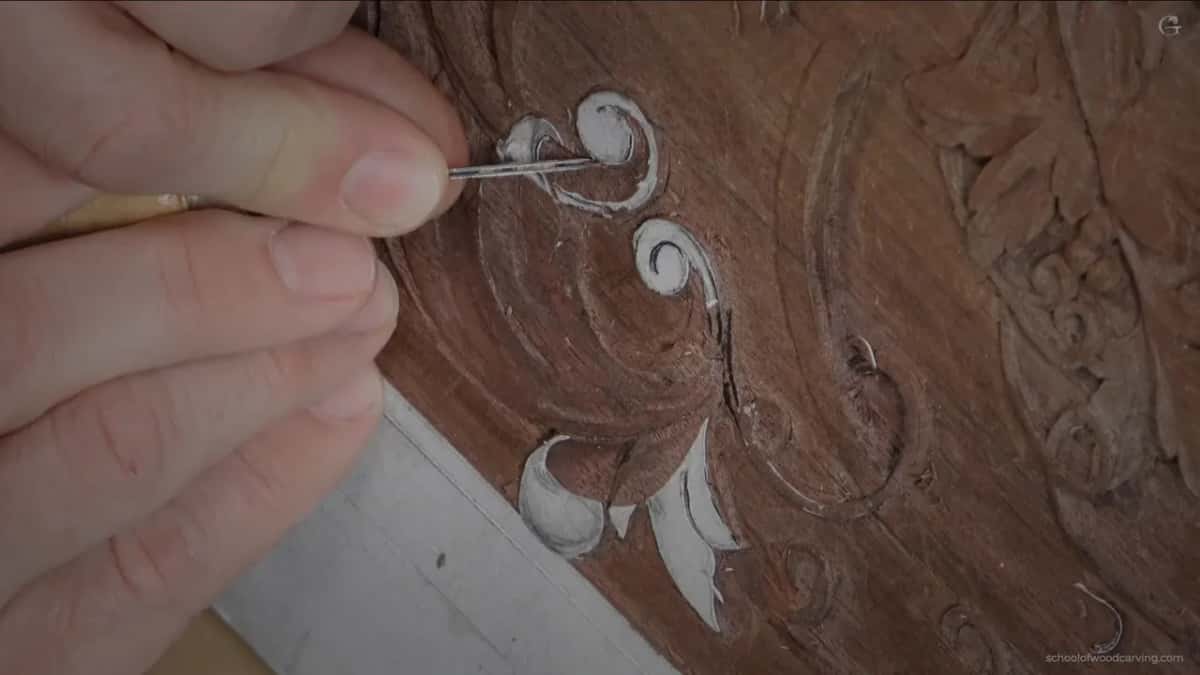
Straight down went the first pass, flute up to about 12 o'clock. Keep an eye on how deep the background is, because that pass cannot go deeper than the background. Don't worry if it doesn't look clean yet. That line is really important.
In the third video I came back to that tool and called it one of the best friends of the furniture makers. You lay it on one of its sides, in my case the left-hand side, and start undercutting. Not much. Even a small undercut already casts some shadow, though you don't see it on camera, and all of the details get undercut, the whole thing.

Back in lesson 15 of this panel I named the veiners for this type of carving. Three millimeter, two millimeter, one and a half, one, and half a millimeter. That's must-have tools, I said then.
What changes on the second volute?
Mostly its direction and its size, since it is the smaller of the two. The second one gets the same treatment, but it stands in opposition to the first and takes less space, about 40 to the other one's 60. Why that is comes from the golden ratio, and the story is on the page for lesson 34.
I made a relief cut all around it with the number 11 at 2 mm. Next came that number five, 6 mm, a quarter inch, with just the corner of the tool, the left side this time. Pushing would work in this case, because it's a small area. But to be consistent, it's better not to push, and it gives you a much better result.
A flat chisel then made the same slant on the opposite side, outside this time, carefully. It's almost impossible to see. If this were a bigger scale, you could add another concave inside it. It would cast extra shadow and look really wonderful. In this case it probably doesn't show much.
A classical volute is a different job, with the upper part raised slightly and then going down slowly. I carved one of those on this panel in lesson 30.
What raises the eye of an acanthus leaf?
A concave on each side of it, so the middle stays raised. Where two parts of the leaf intersect each other, that's the eye, and you've got to have a convex there, a raised part. To make that convex I have to carve the concave on both sides. There are multiple ways to carve an acanthus movement. Here I stuck to the idea of what they did in the late 18th century.

Any small tool will do. Mine was a number eight, about 4 mm (5/32 in), for the concave right beside the future convex, then exactly the same on the other side. The scale is kind of small, so I don't carve all of the movements an acanthus is supposed to have. But on that small scale every little detail helps.
Next I wanted this part of the acanthus to lie on top of that part, and I took my number one chisel. Again I was slicing, not just pushing, and almost no material came off. That's all I needed. A number six or five could take the concave a little deeper there, which I don't really need, I said. Well, it's okay, I did it anyway, and then I blended it all with that number five. That leaf was ready.

Why be so careful at the molding line?
A molding sits right there, and I want it to feel like the acanthus is wrapping around it. Laying that part right on top there is something I don't think I can do, I said, because it is supposed to be kind of high.
So I grabbed a knife. Any knife will do. The line came first, and I have to be really careful with it, because that line is important. A couple of passes, maybe more than a couple, and the same knife removed a little of the acanthus.

Then a number three, a quarter inch, blended all over, from this side and from that side, with just the corner of the tool. Later on, I said, I'll come back there and undercut, using that number 11 again.
In Acanthus over Moldings, lesson 1, I gave the same warning. Just be careful, don't dig too deep on that line. Dig too deep and you're going to damage the future molding, and it's not going to look natural. The molding goes underneath, the acanthus gets undercut, and I don't want to see a line going straight down.

When does the knife become a scraper?
More than once in this lesson, whenever a part was shaped and some paper was still left on it. This is furniture, and furniture makers, they really love scraping. I used just the knife for it, and I kind of like it.
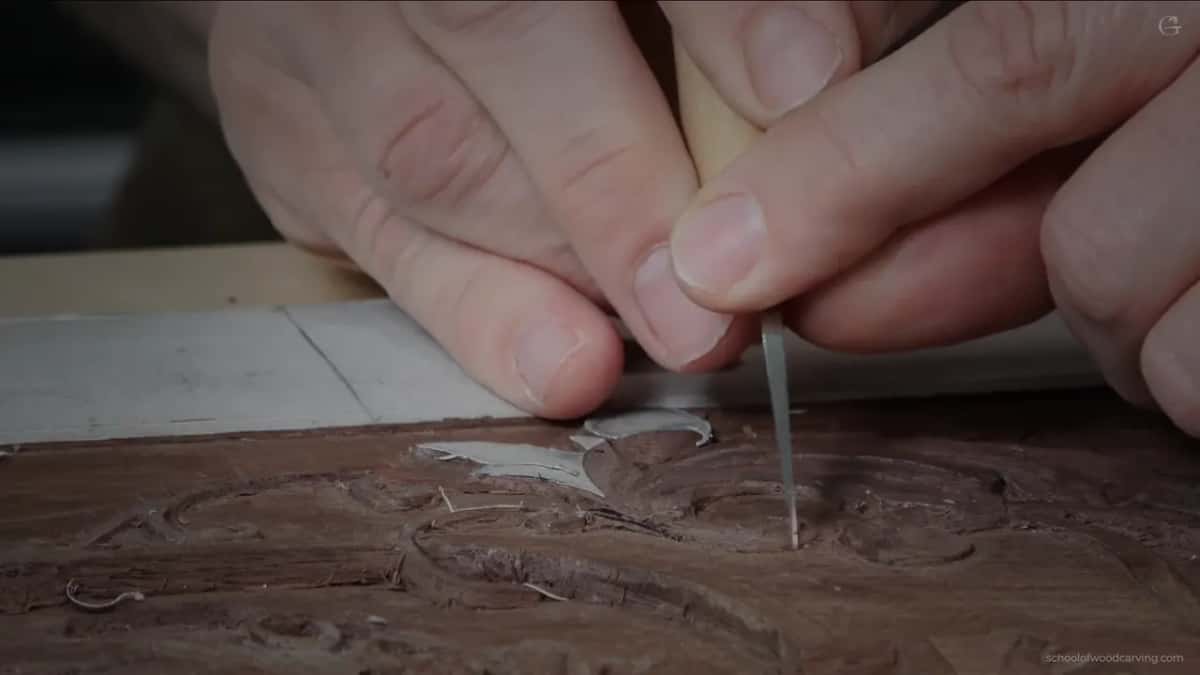
Scraping alone can give a really good result, I said, and it blends really nicely. It gets rid of really sharp ridges or facets. Any knife works for it. I have some really cheap tools for scraping, but not this one. The knife in my hand that day is an excellent one, and it doesn't do any damage.
Later on I'll go all around and scrape everything. That tail is done. The last two parts I said I'd probably do off camera, because they are the same as what I've done multiple times.

Two small volutes, one leaf, and walls you mostly see from the side, on a relief only a few millimeters deep. The lesson before this one is lesson 36. The whole course sits in Carving Furniture Panel, Part 3, with the drawing behind it in Designing Furniture Panel, and every lesson is open to you through Tuition.
Got a flat-looking volute on your own board? Look at it sideways first, the way I did.
How it's done
- Leave room for the slant. Next to the volute's main part I kept extra space and drew a pencil line about 2 mm in. Everything past it turned into a concave.
- Outline it shallow first. My 2 mm veiner went along the line on one side and set an intersection point, 1 mm deep at most, so the fibers took less stress.
- Carve the wall on an angle. My tiny number one chisel stood the wall up at 45 degrees or so, not square, and then ran downhill. Only its right-hand point did the work.
- Walk the gouge toward the first line. A small number five, started from the left, sliced slowly up to my earlier line. Across on the far side I kept under one millimeter, to stay consistent.
- Tuck it under. The half-millimeter veiner stood straight up, flute at 12 o'clock, never below the background. Later I tipped it onto its side for a small undercut that already throws some shadow.
- Look sideways, then scrape. From above the slant hardly showed, so I looked at it sideways. To finish, a knife scraped off the ridges and facets that were left on the leaf.
Frequently asked questions
Does an angled wall really make a volute look tilted?
For me, on my walnut panel, it did. Instead of a square 90 degree pass, the chisel leaned over to near 45, which keeps a little extra wall standing. Look down at it from above and you hardly notice anything. Sideways, the part drops slightly toward the background.
Do you need a half millimeter veiner for furniture carving?
To me that tool is a must-have, especially if you make furniture, and I call it one of the furniture makers' best friends. I stood it straight down first, then laid it on its side for a small undercut. That pass stays above the background.
Should you push a gouge straight in on a small area?
On my second volute I could have, because the area was small. I sliced anyway, just to stay consistent. Slicing with one corner gives a much better result, and you feel less resistance than with a straight push into the fibers.
What to carve next