
Alexander Grabovetskiy, woodcarver, School of Woodcarving · Published 2024
Why should an outlining cut stay above the floor?
Quick answer: Stopping an outlining cut above the floor is how I keep the background clean and keep wood for the undercut. On my walnut panel a millimeter or so stayed, because a cut taken to the bottom leaves marks I can't clean, and going too deep damages the edge I plan to undercut.
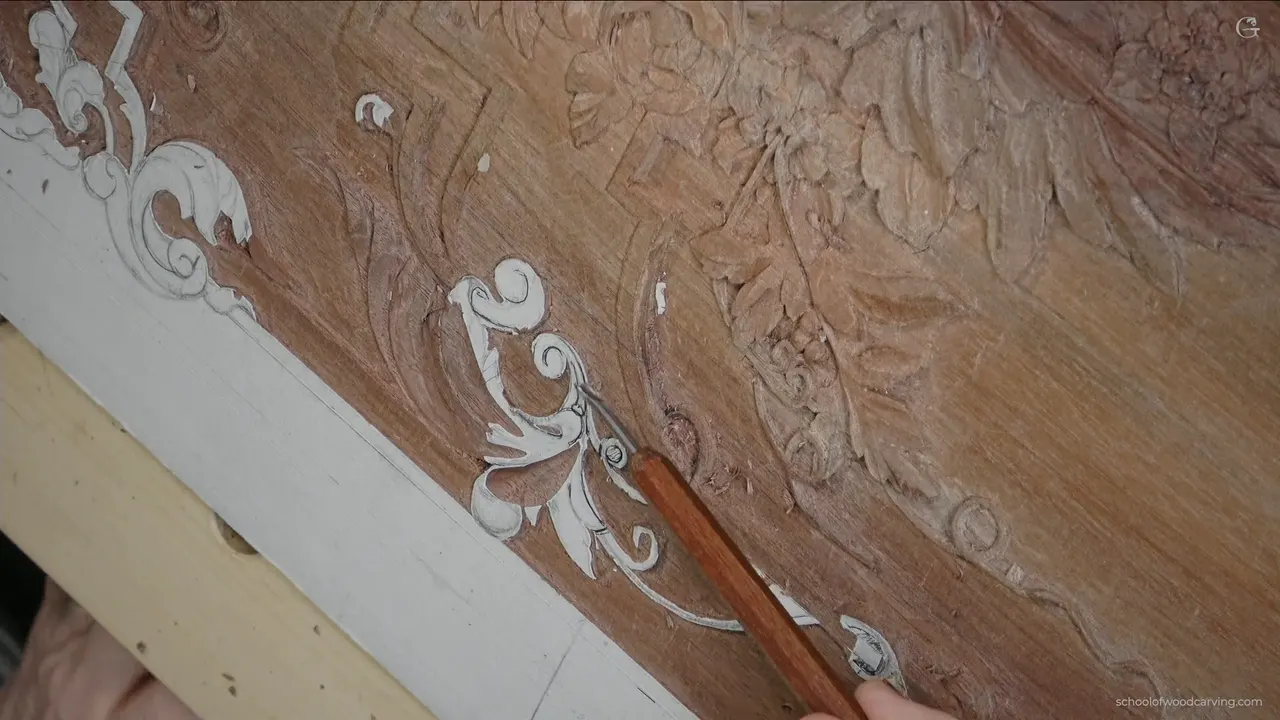
Stopping an outline cut short of the background is how I save two jobs for later on this low relief walnut panel, the cleaning of the floor and the undercut under the edge. In lesson 36 I said both out loud. If my cut goes all the way to the background, I'm not able to clean all the tool marks after it. Dig too deep, and I damage the part I want to undercut, so it won't look really clean.
Have you ever slowed down at the end of a pencil line so you wouldn't run past it? Ever stopped a knife just before it hit the cutting board? Then you already have the habit this lesson runs on, and I'll give you the numbers from my bench, the tools that took the wood down, and the same rule from three other lessons I filmed.
Six lines from the bench
- About a millimeter (0.04 in) stayed above the background, and the final cleanup waited for later.
- Hit bottom, and the marks stay.
- Too deep, and the edge I'd undercut gets damaged.
- Much of the waste came out as plugs.
- Tendrils stay 1/16 inch wide, about 1.5 mm, so they read as tendrils and not as leaves.
- A finger on the board acts as a spring.

Why does an outline cut stop before the floor?
Two reasons. Both came up on camera, the first one in the third video. I took my number one chisel straight down near the background and said don't pay attention to that mess. Then I said it plainly, I'm not going all the way to the background with this cut, otherwise I won't be able to clean all the tool marks.
The second came earlier, in the middle video, while a number three lowered a small area. Be careful when you go straight down, I said. If you go too deep you damage this part, and then you can't undercut it and make it look really clean.
Both jobs come later.
And I care about that undercut. Right there I asked whether it matters and whether I should even do it, then answered of course, because it gives me a shadow. Tiny undercut, beautiful shadow. My tool for it is a number 11, half a millimeter (0.02 in) wide, and the undercutting lesson for this shallow panel is lesson 19 in Part 2.

How much wood did I leave for later?
About one millimeter. Near the end of the first video I went around with straight-down cuts of a number nine, and then I said I left about maybe a millimeter or so for the background. Half a minute later came the rest. The final cleanup of the background I can do a little later, I said. For now it was just a preliminary idea.
During the second video a number three lowered another section, and I said I would go no more than one millimeter. One spot had the background already really high, and there I couldn't take much at all.
The caution kept coming back. Watch how deep you go. Be really careful not to go deeper than the background. With the knife in a corner, don't go too deep on the background. The shortest version came in the third video, when I said I'd take care of the cleaning a little later and you know by now why.
The other side of this, a hollow that must not drop below the background, is in lesson 28.

Why did the waste come out as plugs?
Control, mostly. First a spoon number nine, a quarter inch, went straight down little by little, tapped with the bronze mallet. I didn't want to overdo it, I said, and maybe this 6 mm is a little too big, and a number eight, nine or ten will do.
The second video brought a tiny Dockyard tool, equal to a number eight. They don't mark those tools, so a nine or an eight of about 1/8 inch, 3 mm, will do. Straight down, pretty much 90 degrees, a little rotation, and out came my plug.
Minutes later, more plug cuts with that same small tool. I mentioned a different technique for that material and said it has a limitation for me. You'll find the full story of the plug cut in lesson 26.


Pencil or knife for the line you can't cross?
A knife. Two lines here mattered most, one I didn't want to mess up and one that is part of the molding, and I called the first one really important, twice. A pencil can place a line, and that would be my boundary. Much better than a pencil would be some kind of knife.
While that knife was in my hand, I ran it along the whole side. Later a small number one chisel with a double bevel, about 3 mm, or an eighth of an inch, outlined the molding, because I want to make sure I'm not losing the picture.


What does 90 degrees mean on a straight-down cut?
The bevel against the background. In the first video I set the number nine, 6 mm, about a quarter inch, close to the line, 90 degrees toward the surface, perpendicular to the surface. A warning followed. Make sure you don't undercut there, so position your tool. There is some bevel on the backside, and the 90 degrees I'm talking about is the bevel versus the background.

How does one finger help with microcuts?
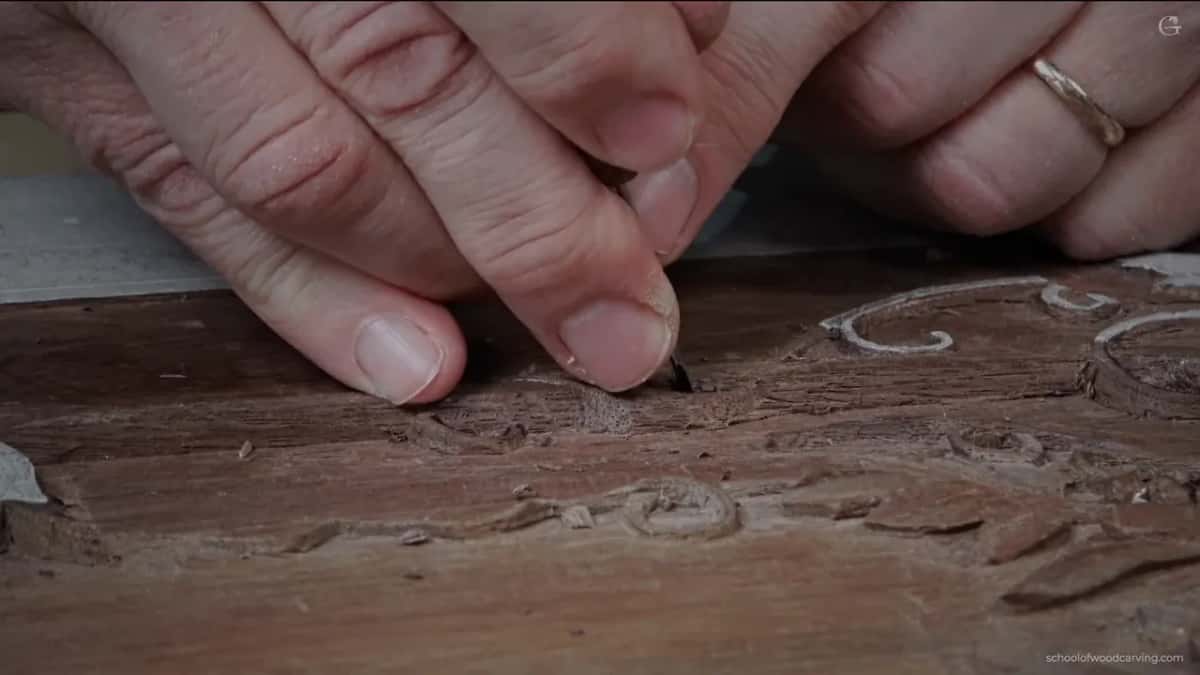
It acts as a spring. A few minutes into the third video I asked you to keep an eye on what I do with the finger. It makes a support spot. With it I have a lot more control, because I don't want to overcut, or sink in too far. I wasn't sure springness is even a word, I said, but it feels like a spring, and that way I can control microcuts.
The mallet gives me control too. The bronze mallet came out in the first video, and a bronze mallet you hold pretty much in your palm. Later, on the half millimeter veiner, I said again that the mallet gives me much more control.

Where does the tendril go under the molding?
Under, over, and under again. I planned it out loud in the first video. This section gets lowered, that part goes right underneath of the molding, there's some excavation, and then it wraps around and goes downhill. A kind of flipping motion, I said, like a tendril, the same idea I had carved on another spot of this panel.
A flat number three, a quarter inch (6 mm), took it almost to the background. Looking from the side, I said, it has to be really gradual and natural, so it feels like it goes right underneath of the molding.
Near the molding, where some material had to come out, a number 11 went in on one of its own wings, the left one, flute at about nine o'clock, no more than half a millimeter deep. Not too deep, I said, and without losing the feel of the molding.
The third video opened on it again, from another position. It wraps underneath, then goes on top, then goes underneath. I know it's almost impossible to see, I said, and some color and aging later on would show it much better. Walnut doesn't help. It is not that easy to see on a darker species like walnut. Design lesson 9 has the drawing side of a volute curling behind a molding.

How thin is a tendril on this panel?
A sixteenth of an inch wide at the most, 1.5 mm. The first video gave the reason, I want it to feel like a tendril and not like a leaf, and the number came again in the third. On camera it looks big, but it is not, and that part is actually weak. So remove the wood around it slowly. That's much safer, and you're going to be happier, I said.
Some of you didn't believe the size. Even if it looks huge on a screen, I said, it's only a millimeter and a half. I know some of you said no, there's no way. Yes, it really is that small. The same width for every tendril on this panel is in lesson 31.

Did I say the same thing on other carvings?
On this same panel, back in Part 2. In lesson 21, a number three on a straight-down cut stopped before the background. If you would ask me why, I said, same idea, exactly the same idea. Reaching the background creates a tool mark, and I still wanted to undercut underneath that section a little later.
On the Venice Room project, in workshop 92, I was outlining with a knife. I have to be careful how deep I carve, I said, because my knife is super sharp and it can penetrate really deeply, and with that I can damage my background. Then came an exception. On that piece it would be all right, since that background was going to get a texture.
And in Venice Room workshop 121, during a preliminary cleanup with a number 11, I said there's no reason to make the final, final cleanup yet, because we still have to work out some details on the inside.
Which tools did the work in lesson 36?
Mostly small ones, listed here in the order I used them.
| Tool | Job | When |
|---|---|---|
| Spoon number nine, a quarter inch (6 mm) | Plug cuts straight down in the bigger pocket, tapped with the bronze mallet | Early in part one |
| A knife | Marked the boundary line, then ran along the whole side | Before the shaping, part one |
| Flat number three, 6 mm (1/4 in) | Shaped the part that goes under the molding, almost to the background | Late in part one |
| Tiny old spoon gouge, about 3 mm (1/8 in) | Gave a little better cleaning, not too deep there | First minute of part two |
| Dockyard, about a number eight | Small plug with a little rotation where the background was high | Part two |
| Half millimeter number 11 | The tiny undercut, for a beautiful shadow | Parts two and three |
| Upside-down number five, an eighth of an inch (3 mm) | Roundness all around while keeping the high spot | End of part three |
The number seven I grabbed in the second video says 6 mm on it. It doesn't look like six to me. More like 5 mm (3/16 in), and I just take the tool I think will fit the profile.
That tiny spoon gouge is an old one. Unfortunately no modern manufacturers make those anymore. Check on eBay, where sometimes you can find tools like that, or make your own.
The router plane stayed out of it. I could grab it and clean that background, I said, but I don't think I need it. A really short bent number three spoon gouge could get the same result, I said. The router plane comes back in lesson 38.

When does the undercut happen?
Later, or right away. In the second video I said the number 11 would come later on for the undercut. Two minutes into the third, I said yes, I will undercut, let me actually do it right away, and angled my number 11 slightly. Later, by a leaf that goes underneath, the flute sat at about 11 o'clock. So I create the shadow there, I said, and it's going to look good.
Before that, a smaller number eight did the excavation, straight down like a plug cut, then from the opposite side, then flipped and downhill. That's exactly what I'm doing, I said. Just excavating. Digging and digging and digging. After that I said I kind of like how it looks, and now you can see the shadow.

How do you blend an eye so it doesn't look stripy?
Where two leaves overlap, there's an eye. You should be able to remember by now, I said, that around the eye it's got to have a convex. That convex runs to the detail we just carved, so two concaves had to go beside it. They're shallow, only an indication, made with a number eight.
Two tools gave it shape and roundness. First came a number three upside down, one notch and then another. It doesn't look appealing yet, I said, but it'll look really good. Then a small number five, upside down, for roundness all around while I kept my high spot.
After that it's just blending. You don't want to overdo those details, otherwise they get too stripy. It has to be gradual, and it has to look glowing.


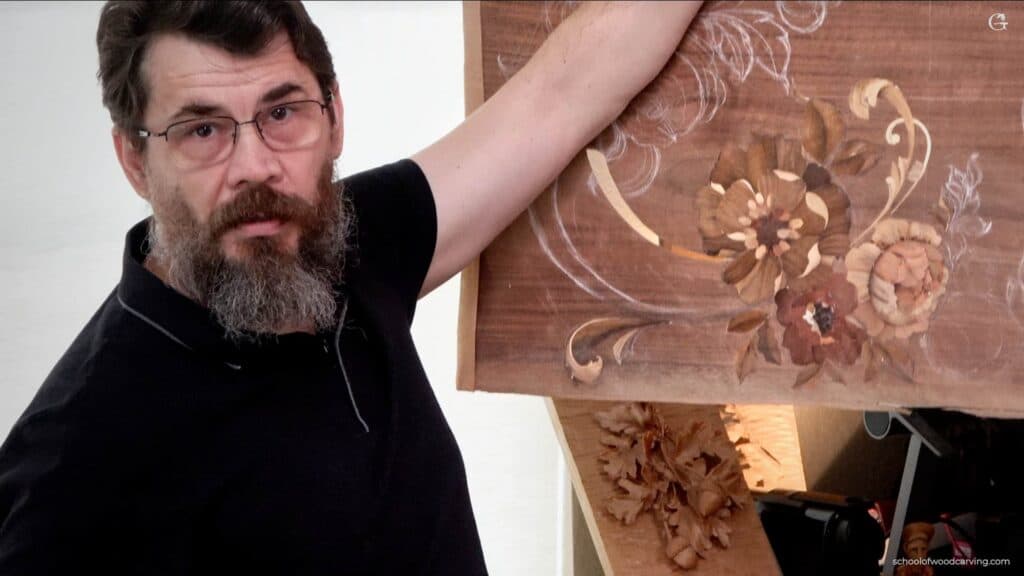
Why was a marquetry panel on the bench?
The lesson opened with a question for you, not with a gouge. Wood carving isn't the only thing I do, I said. Sometimes I do marquetry, and I held up a panel still in progress, with multiple flowers and leaves left to do.
Even the word marquetry is French, I said, and the French used different equipment. They would scroll their pieces. I named one famous French maker of it, who used different materials, bronze and wood.
My technique came before the French, I said. It was known in Germany in the 15th century and even before that in Italy, and it's called window style. Its advantage is the direction of the grain, which matches the movement I want to see, so every movement of the grain looks natural.
I like it more than scrolling, I said. Don't get me wrong, I do like scrolling, it's just different, and I think there are a lot more possibilities without it, and then I asked if you'd want a course on it.


Can you see a millimeter on a ruler? And can you stop your hand when you decide to? Then you can leave that millimeter for later, and the rest is patient digging on a walnut board. You'll find the whole panel in Carving Furniture Panel, Part 3, the drawing behind it in the design part, and Access on the tuition page.
How it's done
- Mark the boundary with a knife. My boundary could be a pencil line, yet a knife is much better. While it's in my hand, it goes down that whole side.
- Take the waste out in plugs. A small number eight goes straight in, gets a little turn, and the plug pops out. Bit by bit, so I don't overdo it.
- Stop short of the floor. Roughly a millimeter stays for now. Hitting bottom would leave marks there that I can't clean later.
- Keep the bevel at 90 degrees. On a straight-down cut the square is the back bevel of my tool versus the background. So I don't undercut where I shouldn't.
- Brace one finger. One fingertip on the board gives me a support spot and some springness, so microcuts stay under control.
- Undercut for the shadow. Later a half millimeter number 11 slips under the edge. Small undercut, beautiful shadow.
Frequently asked questions
What happens if an outline cut goes down to the background?
I can't clean every tool mark on the floor after that, as I said in part three of lesson 36. Too deep also spoils the edge for the undercut. So on this walnut board roughly one millimeter stayed, and the final cleanup waited.
Is a pencil or a knife better for marking a carving boundary?
Pencil works as a boundary, I said. Some kind of knife is much better, though. With it already in my hand, I ran it down the whole side, next to the molding edge I couldn't afford to lose on that board.
How wide should a carved tendril be on a shallow furniture panel?
About a millimeter and a half, no wider than 1/16 inch, on my walnut panel, so it reads as a tendril and not as a leaf. Under the camera it looks big. In real life it's small and weak, so I take the wood next to it away bit by bit.
What to carve next